
Build Page: 1 2 3 4 5 6 7 8 9 10 11 12 13 14 15 16 17 18 19 20 21 22 23 24 25 26 27 28 29 30 31 32 33
Day 9 - 3-2-10 - I have a Street Triple belly pan to go on which I bought second hand. Unfortunately it came without the mounting brackets so I had to order those. I tried to fit it today and even though the mounting brackets are genuine Triumph I couldn't get the front brackets to fit on the bike. I wondered if there were more brackets I needed. Luckily I managed to get a close up look at another forum members Street Triple R (Thanks Bean Machine. He only lives two minutes down the road). Saw the problem straight away. The Street Triple has some extra castings on the lower sump where the front brackets locate. I thought that this would be one of the easier jobs!
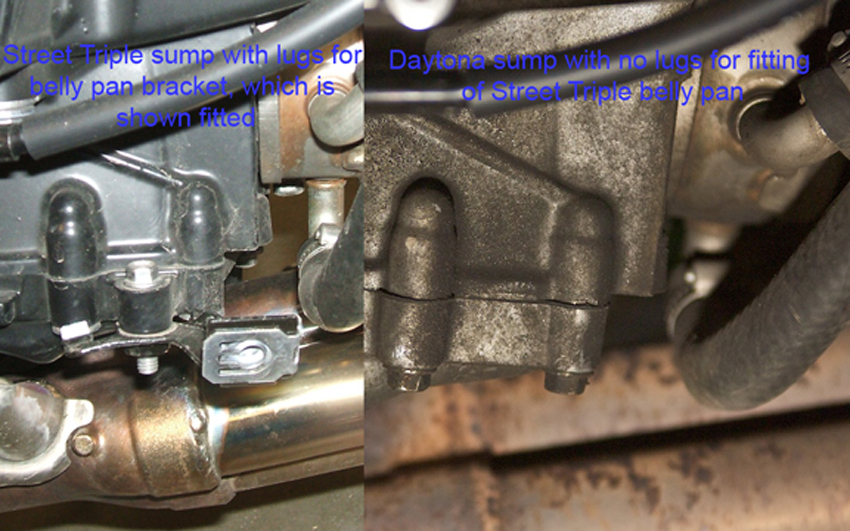
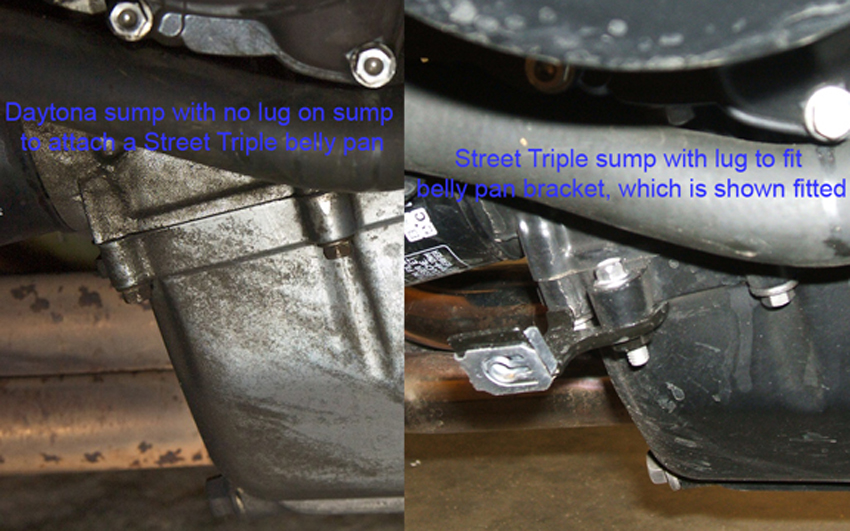
So I reckon I have three options:
Weld some mountings onto the existing sump.
Buy a second hand Street Triple sump, assuming they are the same as a 675.
Make some brackets for the Triumph brackets to attach to and mount these using the two nearby sump bolts.
I'm just doing a welding course at the moment, but I think I'll pass on option 1. I think either option 2 or 3. Have to check out the sump part numbers.
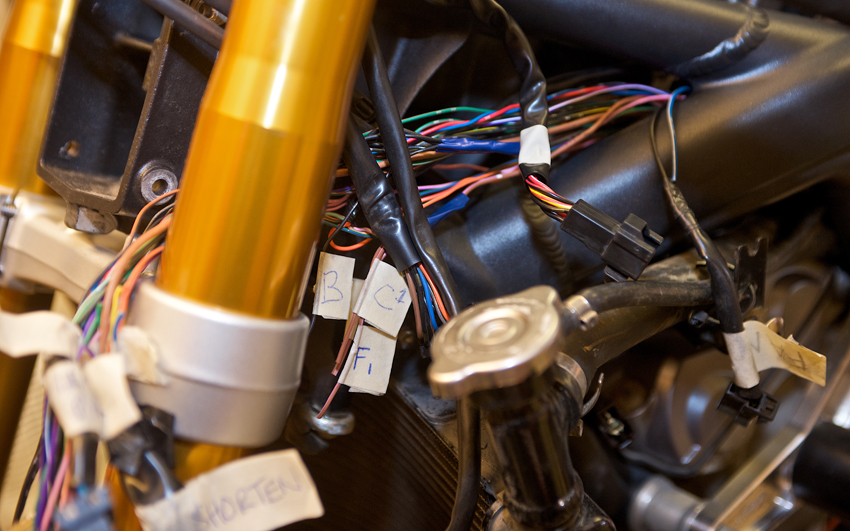
More wiring today! Soldered a big wire to the fuse box. Not a great job. Fit new block connectors to the right handlebar switchgear and the joining side on the loom.
Day 10 - 4-2-10 - Yet more wiring! Fitted new block connectors to the ignition switch wiring and the joining side on the loom, then the left handlebar switchgear and the joining side on the loom. Before cutting wires I make notes of what wires go where and take photographs just in case. When looking at the left handlebar switchgear block connector I found that two wires do not connect to anything on the opposite block connector! Having no electrical knowledge I didn't understand this. Surely a wire coming out of the switchgear needs to attach to something else?
Time to consult the wiring diagram in the manual. In the manual it shows that the red/yellow wire does not connect to anything! It's for the dipped beam switch on the headlight. As my bike has the dipped beam on permanently, could it be that some markets in the world can turn their lights off and in these countries that wire would connect to another wire in the loom?
Then there is also a blue wire which I think comes from the indicators. This doesn't even appear in the wiring diagram in my manual! It also doesn't connect to anything on the loom side connector.
Confused!
Day 11 - 5-2-10 - More work on the ignition switch block connectors. Move the wires for the flapper valve and horn. Will put a resistor onto the flapper valve later. 47 OHM I believe?
Moved the indicator relay to its new home on top of the airbox with all the others and reconnected the wires to the loom.
When I has having a look at Bean Machines Street Triple R I noticed that the cables for the lights and speedo exited the frame above the radiator and not the side of the headstock like the handlebar and ignition switches. I had missed this before when looking at a showroom model, but luckily Bean Machine had his forks off so I could see more clearly. This was great help as the exit at the side of the headstock is getting a little busy, so this makes life easier.
So I rerouted those wires. After that I got busy reconnecting a lot of wires that had to wait for other wires to be reconnected to determine how long the wires had to be where best to solder them together. Er, hope that makes sense.
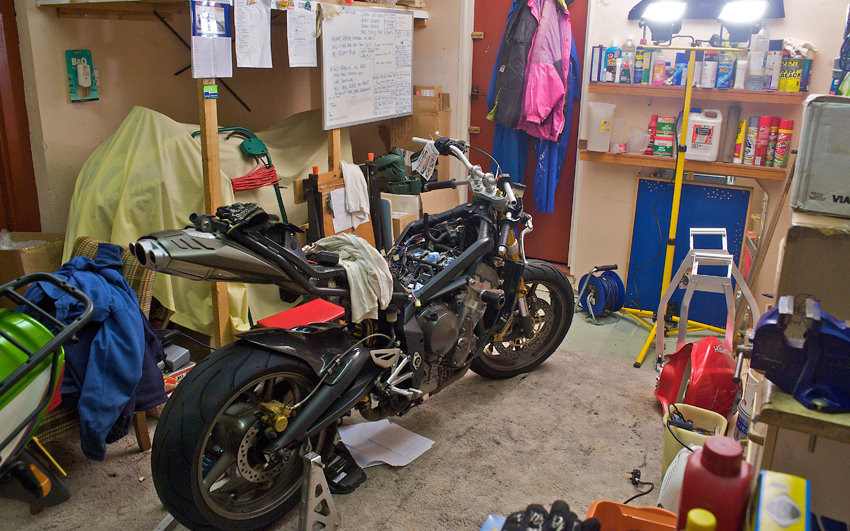
Got a lot done today and I think I'm pretty close to being able to try and start her again, to see if I got it right. Scary time ahead.
If you would like to receive an email update when the next instalment is published then please email me at rubyracing@hotmail.co.uk putting "Project Daytona Street Updates" in the subject box. Don't worry I'm not going to spam you, you will only receive an email whenever I update this site.
Build Page: 1 2 3 4 5 6 7 8 9 10 11 12 13 14 15 16 17 18 19 20 21 22 23 24 25 26 27 28 29 30 31 32 33
*
 |
 |
 |
 |