
Build Page: 1 2 3 4 5 6 7 8 9 10 11 12 13 14 15 16 17 18 19 20 21 22 23 24 25 26 27 28 29 30 31 32 33
Day 2 - 19-12-09 - Few jobs I got done today. First off was to ditch the air intake, the pesky flapper valve and associated vacuum canister and wiring and tubing connected to it. It all came off pretty easy. Going off what I have learnt from others on this forum I can ditch the electric box which is connected to the vacuum canister, but I have to put a 47 ohm resister in its place. That's a bit further down the road at this time, so we'll come back to that.
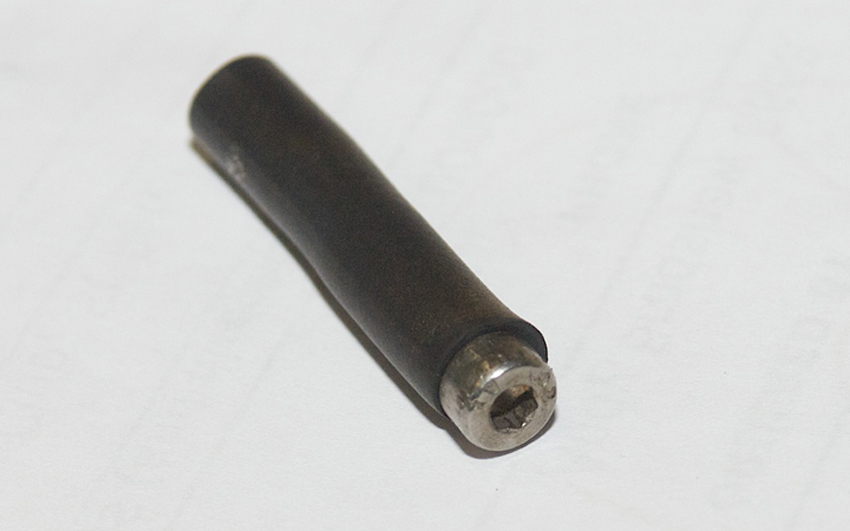
The tube that connects up to the throttle bodies/injector assembly needs to come off and I have again followed the advice of others on the triumph675.net forum and plugged the inlet to the throttle bodies. I can barely see where it connects, so no photos. But what I did was to cut a short section of the rubber tubing, about 3cm long, plugged one end with a screw, then fitted this small bit of tubing back onto the throttle body. Hopefully that will do the job. The screw is too big to get sucked into the metal hose attachment, so I figure the worst that can happen is the hose falls off. Photo of the tubing and screw below.
I have removed the radiator overflow bottle as it looks a bit nasty on show to the world. I plan to get a Street Triple overflow bottle as this sits under the seat, behind the battery (update from the end of the build: there is no way a Street Triple overflow bottle will fit under the seat of a Daytona). Only seen one on eBay so far and it was silly money. I could get a new one for the same amount.
An eBay bargain arrived today. I bought a brand new cam cover in black for..............get this................ THREE QUID! Can you believe that? I'll put that on when I change the throttle cables over.
Right. Time to start what I think will be the biggest job: re-directing the loom. Not been looking forward to this bit, but deep breath and get stuck in. I didn't realise undoing sticky tape could take so long. More fiddly than you would think. I was also being careful so I didn't damage any wires.
I got to the relays and fuse box and unwrapped them. Then my heart sunk. A few choice swear words and the shocking realisation that I may have taken on more than I can cope with. I thought, having no understanding of these things, that once I had the loom tape off I could just move the fuse box and relays to their new home under the fuel tank, on top of the air box. WRONG! They connect with other parts at the front of the bike, like the handlebar controls and speedo. This means I have to cut wires, a lot of wires!
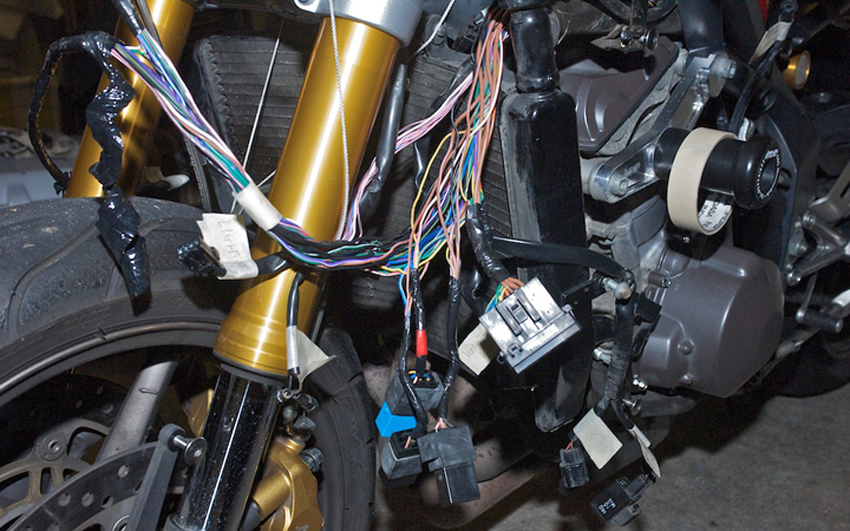
I stared at it for a long time, hoping that it would magically fix itself. Strangely it didn't. I think I need to walk away and have a think. In fact, I'll sleep on it.
A few more choice swear words.
If you would like to receive an email update when the next instalment is published then please email me at rubyracing@hotmail.co.uk putting "Project Daytona Street Updates" in the subject box. Don't worry I'm not going to spam you, you will only receive an email whenever I update this site.
Build Page: 1 2 3 4 5 6 7 8 9 10 11 12 13 14 15 16 17 18 19 20 21 22 23 24 25 26 27 28 29 30 31 32 33
*
 |
 |
 |
 |