
Build Page: 1 2 3 4 5 6 7 8 9 10 11 12 13 14 15 16 17 18 19 20 21 22 23 24 25 26 27 28 29 30 31 32 33
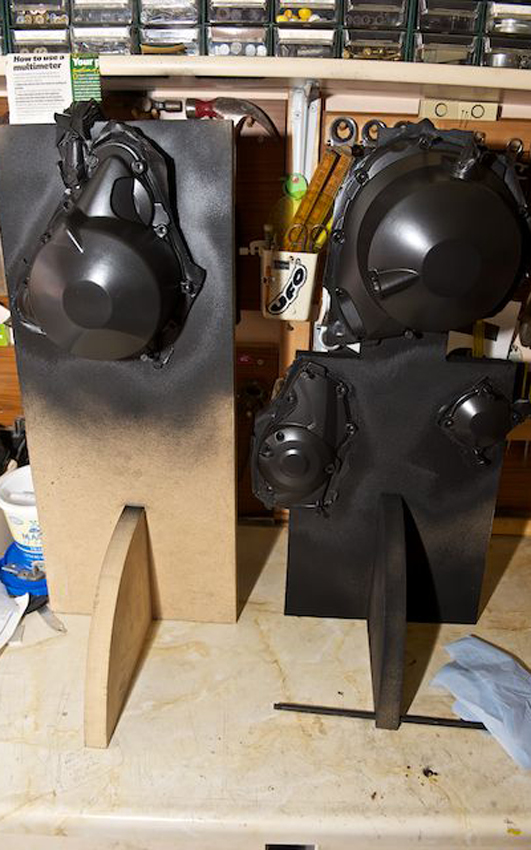
Day 32 - 9-8-10 - I prepared the engine cases for painting by sanding them lightly and cleaning them. Then I masked the areas not to be painted, which was mainly the gasket sealing surfaces. I decided to go with the gloss black paint as the satin looked a little too matt for my liking. Anyway after I had applied four coats the cases looked nice, but not really gloss, more like satin! Not a good match for the cam cover, so I'll need to but some more gloss and maybe stand a bit closer when spraying!
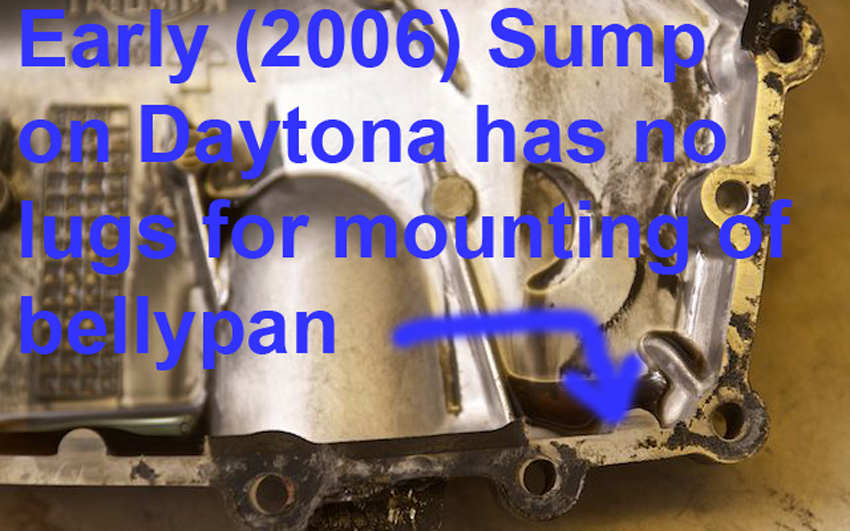
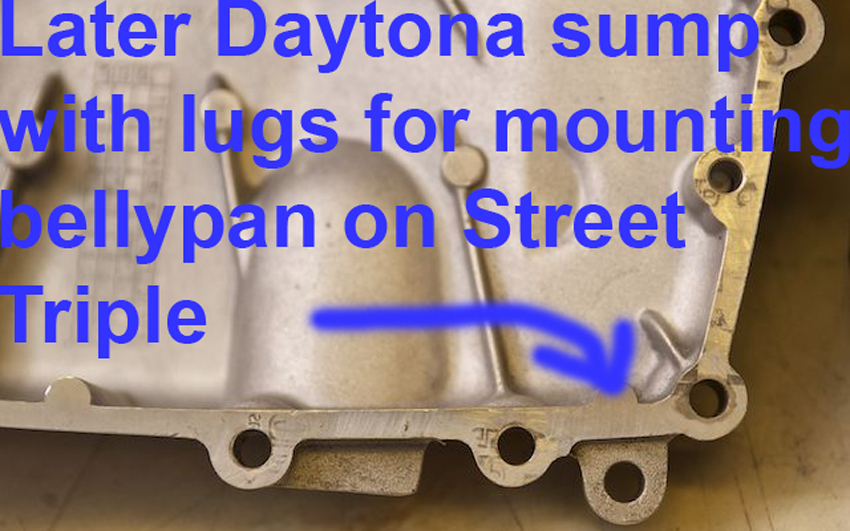
Next up was to get the sump off. It was an awkward job as I have no bike lift and so had to lie on my back and undo all the bolts. That was OK, although getting the sump to drop took some gentle persuasion. Once off I set about cleaning the old gasket off the lower side of the engine case. This was a tough job lying on my back, but I got there in the end. You think a job like changing a casing will take 5 minutes, but you forget about the time it takes to remove the old gasket. Oh well at least I was lying down on the job! I also had to clean the old gasket off my replacement sump and give it a good clean out to remove any crap that was in there. Just to recap, I'm changing the sump for a later sump which has the extra mountings to hang the bellypan from (see pics). Later Daytonas seem to come with the same sump as the Street Triple. No point in Triumph making two different ones I guess.
I fitted a couple of loom brackets to the inside of the frame (I had to buy one as I lost one!), tidied up my wiring for the flapper valve controller, which is now living next to the battery and tidied up some more of the loom.
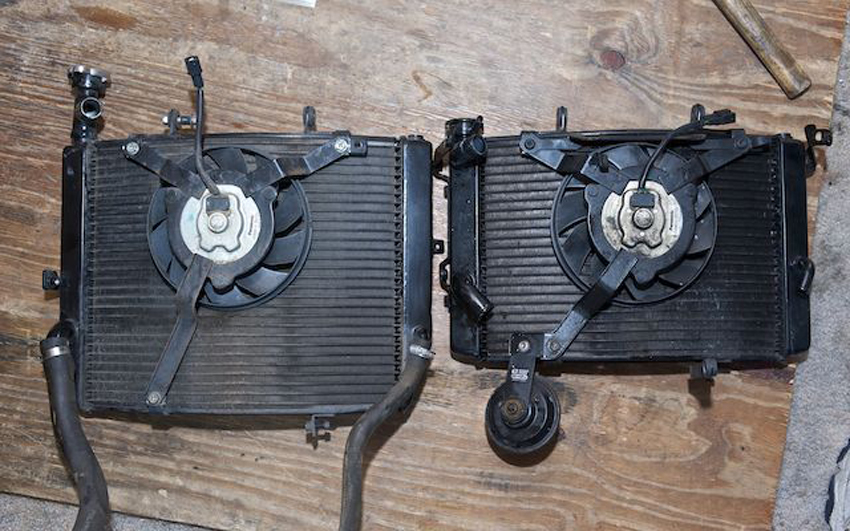
Next step was to offer up the Street Triple radiator to see what I would need to fit it. I need to buy the lower bracket which attaches to the front of the engine and just very slightly shorten the top hose that runs into the filler neck. You can see from the pictures the difference between the Daytona (on left) and Street Triple (on right) radiator. The Daytona one is about 50mm longer and has the really high filler neck. As I want to use the Street Triple rad cowls I got the Street Triple radiator so they would be easy to attach, although my main reason was so the tall filler neck of the Daytona rad would not be sticking out the top of the rad cowls. Only riding it will tell me if the Street Triple rad is too small to keep the motor at the right temperature. If it doesn't then the original will have to go back on. I really hope it doesn't come to that.
Almost forgot, should be picking up my bodywork from the painters this week. Can't wait to see that and must remember NOT to fit any of it until I'm finished spannering. Now where can I store it out of harms way?
If you would like to receive an email update when the next instalment is published then please email me at rubyracing@hotmail.co.uk putting "Project Daytona Street Updates" in the subject box. Don't worry I'm not going to spam you, you will only receive an email whenever I update this site.
Build Page: 1 2 3 4 5 6 7 8 9 10 11 12 13 14 15 16 17 18 19 20 21 22 23 24 25 26 27 28 29 30 31 32 33
*
 |
 |
 |
 |