
Build Page: 1 2 3 4 5 6 7 8 9 10 11 12 13 14 15 16 17 18 19 20 21 22 23 24 25 26 27 28 29 30 31 32 33
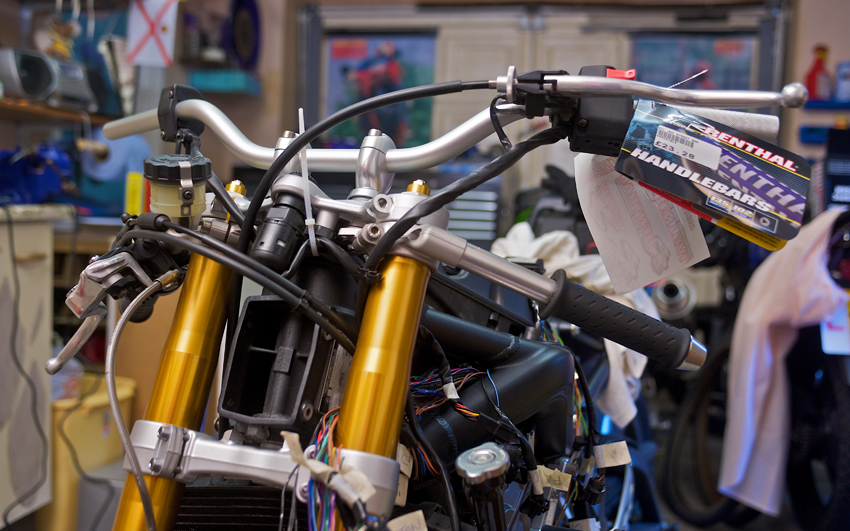
Day 5 - 24-1-10 - Picked up my handlebar risers this week so I have been able to fit the handlebars. They are Renthals Universal Street. Just sitting on the bike in the garage they feel a little low, but I'll reserve judgement until I ride her. I also fitted the Street Triple clutch cable and moved the switchgear and clutch lever onto the Renthals.
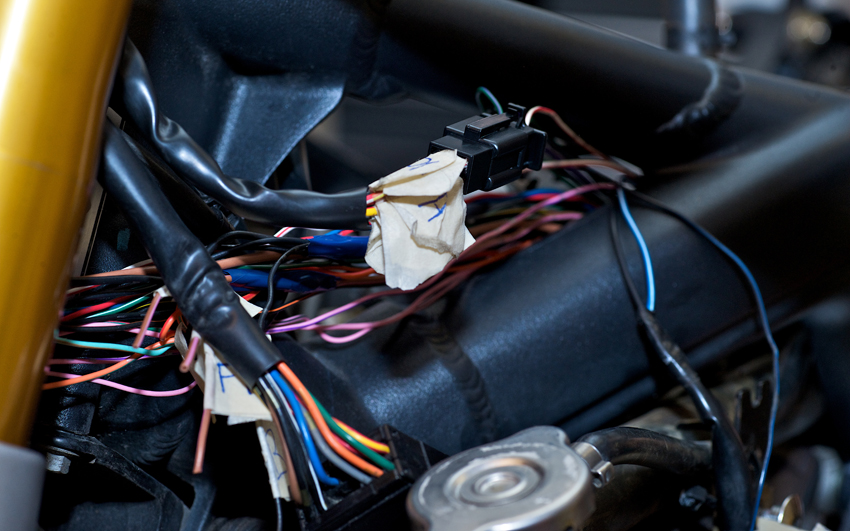
Now I have the handlebars on I can see that the wires from the handlebar switches and the ignition key will reach to their new home behind the headstock, on the left inside of the frame. I may have to shorten one or two of them, which is better than having to lengthen them!
I reckon I have three options to connect these to the loom:
I can cut the wires to length and re-solder the block connectors where I need them.
I can try and source the correct size spade connectors that fit in the blocks and re-use the original block connectors.
I can purchase some new block connectors and connect them where needed.
Re-soldering about 24 wires is going to be a pain in the ass so I will avoid that option if at all possible. Although it does have the benefit of not really costing me anything.
Trying to source the correct spade connectors to fit in the blocks I think will be near on impossible, so I'll forget that option.
Buying some new block connectors is probably the best and tidiest solution, so I shall search for some suitable connectors.
Did a bit more wire soldering, I'm slowly getting better. I found out I didn't have the right size soldering iron so I managed to borrow one from a mate. That has made the job much easier. Right tool for the job an' all that.
Sorry if this seems to moving a little slowly, but sorting out the wires is a much bigger job than I thought and I'm finding it hard to put aside the time to work on her. It's not really feasible to do half an hour here or there as it takes some brain power and I need to have time to complete a batch of re-wiring.
Day 6 - 27-1-10 - Just did a bit more soldering of wires today, including the ones connecting to the lambda sensor in the exhaust. Had some problems with the thicker ones from the fuse box though. Ran out of the thicker heat shrink tubing so have had to leave a couple of the thicker wires for now.
I had a bit of a nightmare though. I had two wires the same colour coming out of a relay and I hadn't labelled them for some reason. Luckily I was able to determine which wire should go where, but I won't know for sure if I got it right until first fire up. I'm still expecting her not to start. I'm the eternal pessimist.
Day 7 - 28-1-10 - I needed to add some wires today. That meant pulling apart the cheap damaged loom I got off eBay. You'd think pulling sticky tape apart would take no time. WRONG! It took me ages, in fact most of the time I had available. Still, it's done now so I can get the wires I need as soon as I need them now. Connected up the wires to one of the relays. My soldering technique is definitely improving now. I put a blob of solder on the soldering iron, then put this under the wire to be soldered and at the same time I add some solder to the soldering iron which seems to make it easier to get the solder to melt into the wires from the top. Whatever, it's getting easier, so another skill is being learnt.

Day 8 - 29-1-10 - Shortened the wires for the flip switch which sits on the right side of the airbox and then soldered them into the loom wires. Next I was looking at the wires from the handlebar switches and the ignition to decide which ones needed to be shortened. Basically I think that I need to shorten the right and left handle bar switch cables and the ignition cable. I will source some suitable block connectors. The cable to the speedo doesn't need to be altered, or the one to the air pressure sensor that sits in front of the speedo. Also the light cable can stay the same, but I will be fitting a different connector as the new light setup is different and I need a couple more wires in it.
Starting to feel more confident about what I'm doing and how I can solve problems. Although I still expect silence when I try to start her again for the first time. When I do get her running again the next worry will be that she doesn't go up in flames due to a wiring cock up.
If you would like to receive an email update when the next instalment is published then please email me at rubyracing@hotmail.co.uk putting "Project Daytona Street Updates" in the subject box. Don't worry I'm not going to spam you, you will only receive an email whenever I update this site.
Build Page: 1 2 3 4 5 6 7 8 9 10 11 12 13 14 15 16 17 18 19 20 21 22 23 24 25 26 27 28 29 30 31 32 33
*
 |
 |
 |
 |