
Build Page: 1 2 3 4 5 6 7 8 9 10 11 12 13 14 15 16 17 18 19 20 21 22 23 24 25 26 27 28 29 30 31 32 33
Day 20 - 13-5-10 - Got a fair bit done recently. I've sanded down the speedo adapter plate to give it a smoother finish. I used some Nitromors paint stripper on the old cam cover to see if it would take the paint off. It does, but only if I use something abrasive to help the removal process. This has the effect of polishing the aluminium which I don't want. I tried using just a rag, but this isn't rough enough. What little it did take off gave me the result I was hoping for: a nice matt aluminium finish. I think I will have to investigate getting the cases bead blasted, as I'm told this will do what I want.
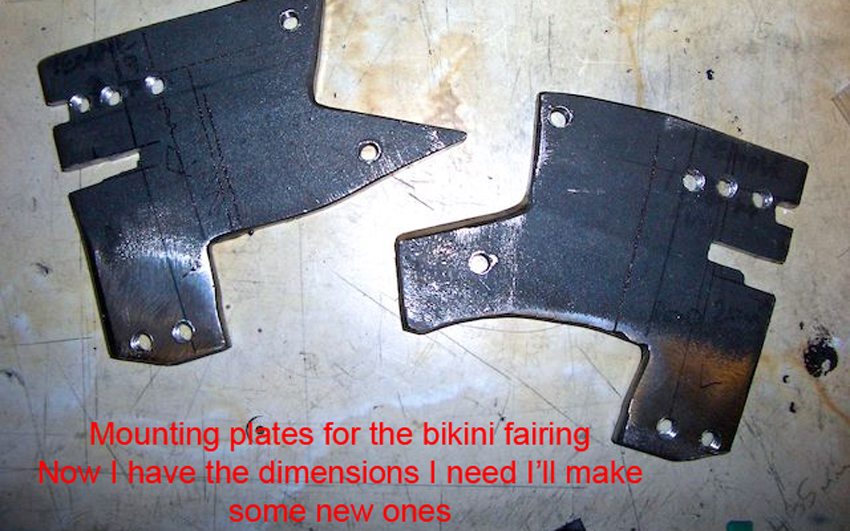
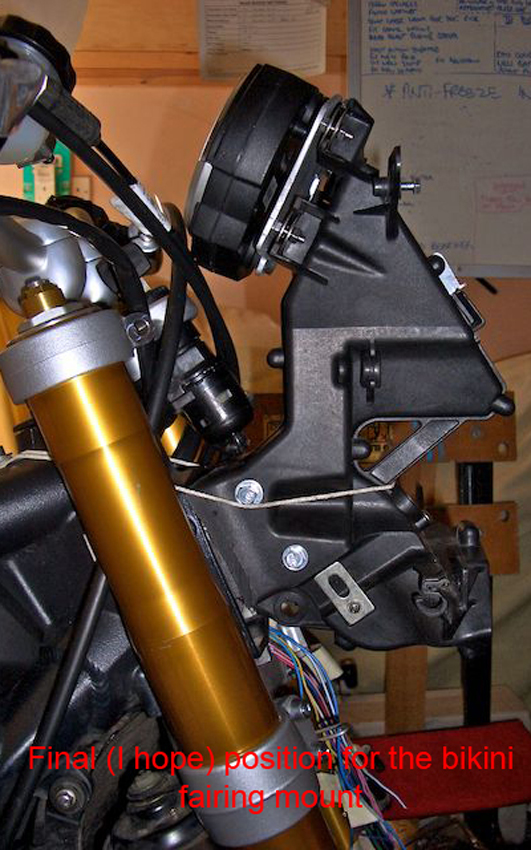
Most of my time has been spent fitting the bikini fairing mount. My first position was OK, but I wanted it closer and higher. To raise it I had to get my welding teacher to cut 20mm off the top and add 20mm to the bottom of the plates which sit in side the air intake in the headstock. This was as high as I could go as the bottom of the ignition barrel is as close as possible. This also meant I had clearance issues with my brake lever if I had it set as low as I like it. So I raised it a bit and then moved the mount backwards. It actually goes downwards slightly so this helped with the clearance issues with the brake lever.
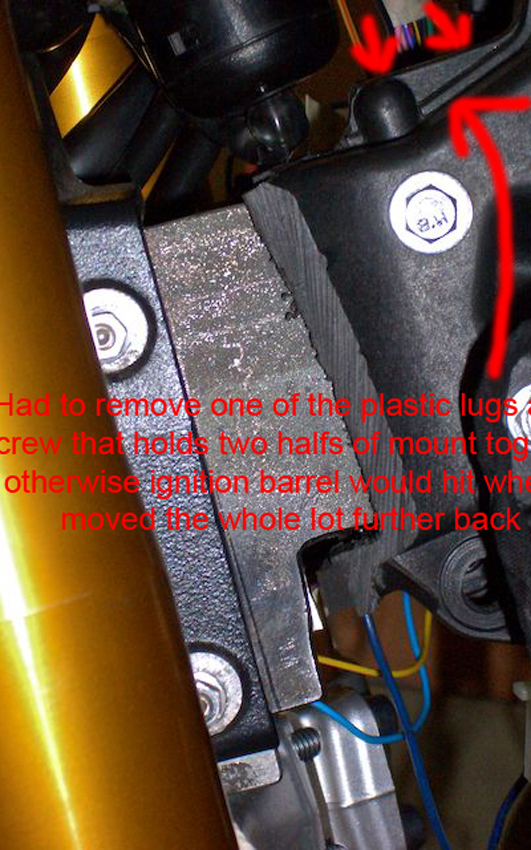
I had to remove one of the screws that hold the bikini mount together, otherwise the ignition barrel would hit and I would not be able to turn the bars. You can see in the pictures where it has been removed. Good old Dremmel!
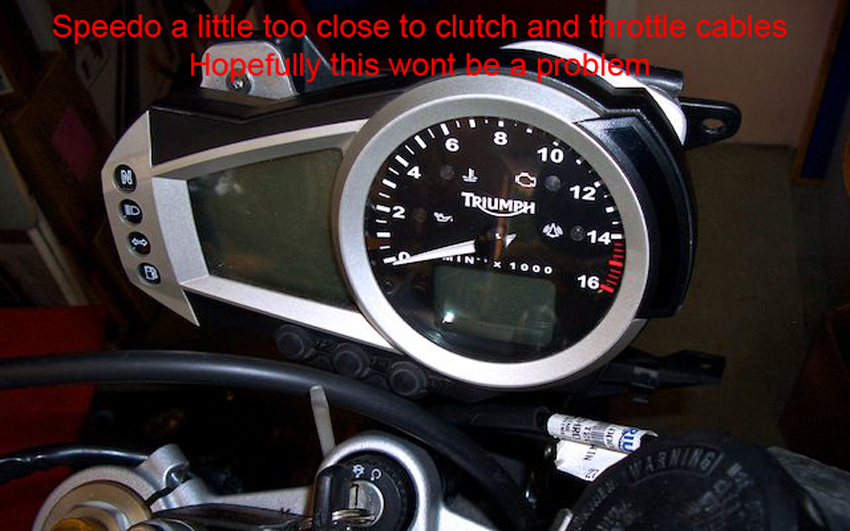
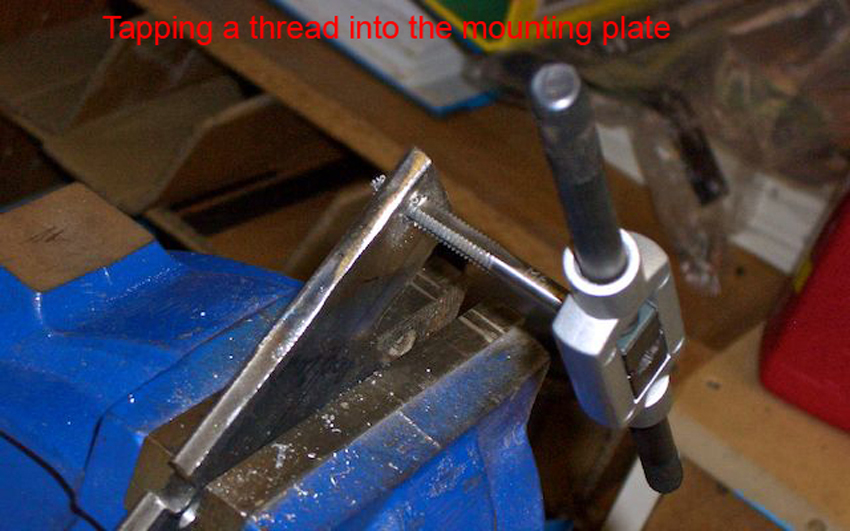
To cut a long story short I tried three positions, moving backwards 25mm from where I started. Much happier with this positioning. You can see the amount of holes I had to drill in the plates, which also had to have a thread tapped in them. That's the shot with the plate in the vice. The speedo is very close to the clutch and throttle cable, so I'm hoping this won't present a problem. I'll find out once I get her running again. I think that could be soon as I just need to get the new longer brake hose on (I've ordered a Triumph OE hose for a Street Triple R) and sort out the wiring for the lights and indicators (just ordered another block connector).
I also went to fit the loom guide that sits on the left of the headstock near the Factory plate. This is an OE item from a Street Triple so I assumed it was a direct fit. Wrong! The bottom hole doesn't line up. Had to ponder that one. Eventually I bent the loop outwards then drilled a hole for the screw that also holds the bikini fairing secure. Once I had the screw in place I could bend the loop back up. Sorted. Or so I thought. I couldn't now fit the loom in place as the screw was in the way. After a bit more thought I realised I would have to mount the cable guide first, then bend the bottom loop outwards, drop the loom in then bend the loop back up. Not an ideal solution, but I shouldn't be taking things apart all the time once I'm finished. At least I hope not, I just wanna ride.
My final problem I need to solve is the hole left between the top of the speedo and the top of the bikini fairing. It's the area I have outlined in red in one of the pics. I can't move the speedo up any higher for a couple of reasons, so that's out of the question. So as Jean Luc Picard was fond of saying on the bridge of Enterprise when they all had about 30 seconds before some huge event would wipe them from the face of the Universe: "Suggestions?"

If you would like to receive an email update when the next instalment is published then please email me at rubyracing@hotmail.co.uk putting "Project Daytona Street Updates" in the subject box. Don't worry I'm not going to spam you, you will only receive an email whenever I update this site.
Build Page: 1 2 3 4 5 6 7 8 9 10 11 12 13 14 15 16 17 18 19 20 21 22 23 24 25 26 27 28 29 30 31 32 33
*
 |
 |
 |
 |