
Build Page: 1 2 3 4 5 6 7 8 9 10 11 12 13 14 15 16 17 18 19 20 21 22 23 24 25 26 27 28 29 30 31 32 33
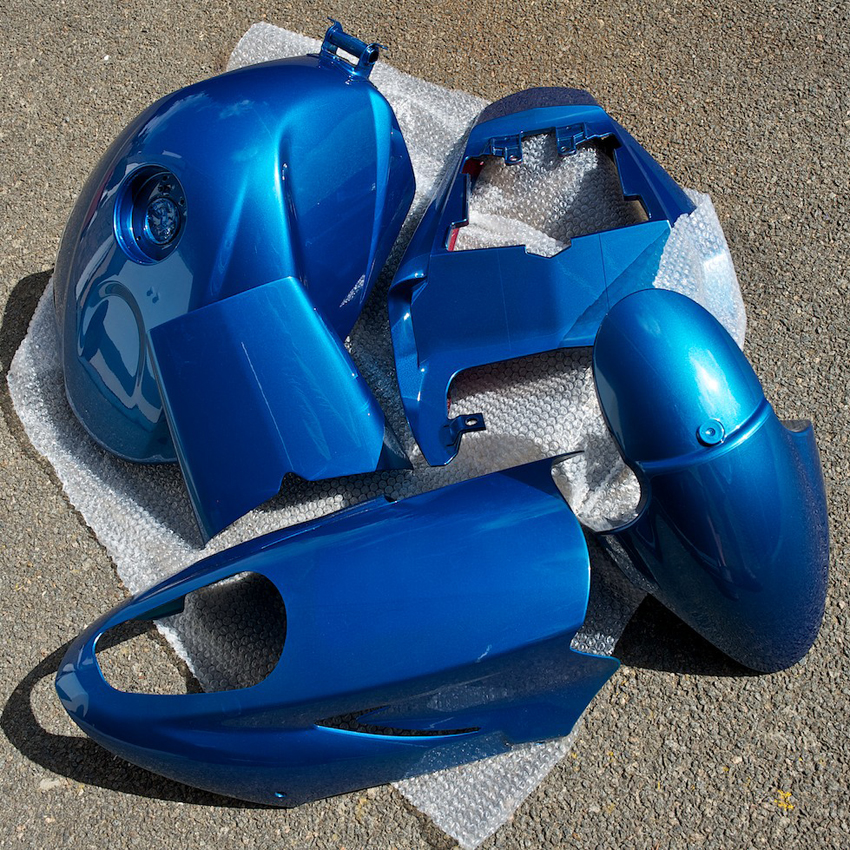
Day 33 - 25-8-10 - Picked up my bodywork from the paint shop today. Beautiful job.
Well I put some more gloss black paint on the four engine cases. This time I managed to get some paint runs on two of them dammit! Cleaned that off reasonably well, but not perfect. The cases have had about six coats at least now and I put more on because the gloss I was using wasn't really coming up as gloss, more of a satin. Well after finishing the second can they still look satin! So that's the look we're having then. I was hoping to match them with the cam cover, but my painting skills obviously leave a lot to be desired. Anyone who has seen the effort on my race bike will testify to that. Best not give up my day job then. Once dry I put the cases back on and they look well. Hopefully they will stand up to use and won't have loads of paint chips within a few miles of riding.
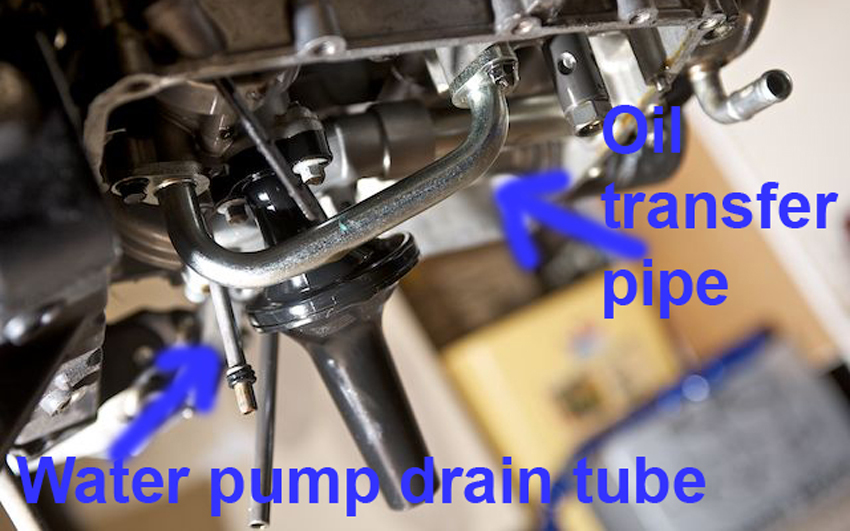
While I was "on the case" I thought I'd put the sump back on. I had got four new "O" rings for the water pump drain tube (see pic) so I fitted those in readiness for the sump. Then I got the new sump gasket out the packet. Hang on a minute! That's not the same as the one fitted by the factory, have I got the correct one? I offered it up and everything lines up. But there is one huge difference. The original is just a gasket that runs along the edges of the casing that join together. The new one does that, but also has a huge flat area going from one side to the sump to the other (see pic) covering half the sump at the front end. I can only guess that this somehow controls oil movement in the sump under acceleration or when pulling wheelies. I have no idea.

Well whatever the reason I can't just fit it straight on because the oil transfer pipe prevents this as it goes through one of the holes. The oil transfer pipe is the silver tube that looks like a door handle hanging from the bottom of the engine (see pic). In order to fit the gasket you have to remove this oil transfer pipe, put it through one of the holes in the gasket and reattach it. No biggie, it's just two 8mm bolts holding it in place. However, where they attach there are "O" rings, which the manual says to replace. Brilliant! Yes I could probably use the old ones, but I don't rally want to be pulling the sump off in the future because they have failed so for the sake of three quid for two new "O" rings I'll replace them. Obviously my dealer has to order these so I have to wait about a week before the sump goes back on. Blast! The workshop manual helpfully says: "If necessary, release the oil transfer pipe fixings and remove the oil transfer pipe". IF NECESSARY? The new gasket ain't going on without taking it off. Who writes this stuff?
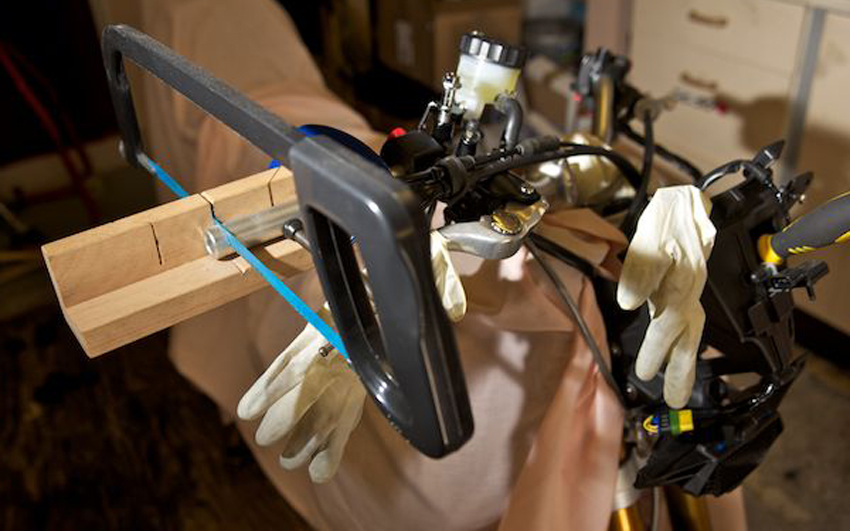
OK, on to the next job then. Even though I used the Street Triple throttle cable it is quite tight at full lock. So I have moved the throttle as far down the handlebar as I can. Maybe if I'd used the OE handlebar rather than a Renthal I might not have had this problem. Still, again it's not a biggie, although it means I have some handlebar sticking out the end of the throttle tube, which looks a bit unsightly. Time to get the hacksaw out then. I take about 10mm off each side and once I get some bar end weights fitted that will look fine.
If you would like to receive an email update when the next instalment is published then please email me at rubyracing@hotmail.co.uk putting "Project Daytona Street Updates" in the subject box. Don't worry I'm not going to spam you, you will only receive an email whenever I update this site.
Build Page: 1 2 3 4 5 6 7 8 9 10 11 12 13 14 15 16 17 18 19 20 21 22 23 24 25 26 27 28 29 30 31 32 33
*
 |
 |
 |
 |