
Build Page: 1 2 3 4 5 6 7 8 9 10 11 12 13 14 15 16 17 18 19 20 21 22 23 24 25 26 27 28 29 30 31 32 33
Day 18 - 24-10-13 - Not much done this evening. However my good friend Shaun came round to lend his professional help with the electrics. First up was the ignition switch. I'm using the ignition from the KTM, basically because the one from the Fazer is knackered. It takes about 20 attempts to turn the key on. Also it saves having to remove the KTM ignition from the top yoke. The wiring on each is slightly different, basically because the KTM does not have a parking light switch in the ignition.
There are 6 wires in total to the KTM ignition switch: 3 power feeds going in and 3 going out, so three pairs of two. The Fazer also has 6 wires, however it only has one power feed going in, with one wire coming out to the parking lights and 4 other wires coming out for things like the fan, horn, etc. What this means is the wire coming out for the parking light can be discarded and one of the 3 wires coming out will have to connect to another wire to make 4 coming out. That probably doesn't make any sense as I don't really understand electrics. Thankfully Shaun offered to re solder the wires into the KTM ignition for me, so when the time comes I will let him do that as he knows what he is doing.
The next item for him to cast his expert eye over was the speed sensor. As I mentioned earlier, from my searches on the Fazer forum it seems that if the OE speedo is not used in conjunction with the OE wheel speed sensor then the bike throws up a fault code. Some have suggested the bike wont run properly either.
It looks like the OE KTM wheel speed sensor can be used as like the Fazer sensor it has 3 wires coming from it. As I'm using a Koso speedo I would probably not be connecting back to the loom, but connecting directly to the Koso speedo. This would mean the bikes ECU would not get any signal and possibly cause the fault code to appear and possibly rough running. When we looked at the wiring for the Koso it also uses 3 wires for it's speed sensor. As the unit I bought was second hand someone had grafted on another wire to go to the loom. Shaun thought that this was the feed for the ECU to prevent problems in the form of fault codes. If he is correct and I reckon he is, then this could be the simple cure to ensure fitting an aftermarket speedo doesn't throw up fault codes. Time will tell on that one.
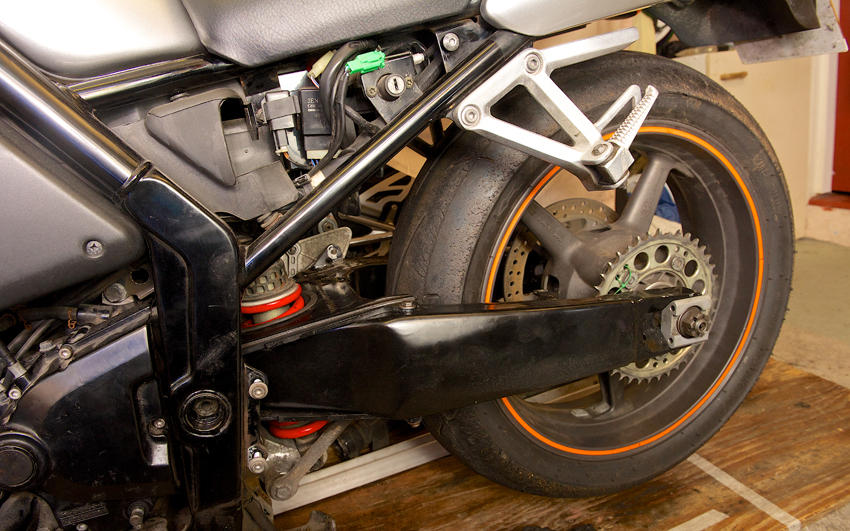
Day 19 - 25-10-13 - Managed to get a couple of hours in after work. Fitted the temporary inserts into the EXUP swing arm pivot, basically they are pretend bearings so that I can mount it with the swing arm axle to see if I got my measurements are correct to cut down the width of it and then to see if it would fit and not hit anything. Initial impressions are yes it does fit. The standard shock fits through, although looks a tight squeeze and the tie rods line up nicely. The exhaust can hits the swing arm, but then it did with the standard one fitted due to the fact the bike went down on the right side and has bent the foot rest mounting lugs. Once these are bent back into place this shouldn't be an issue.
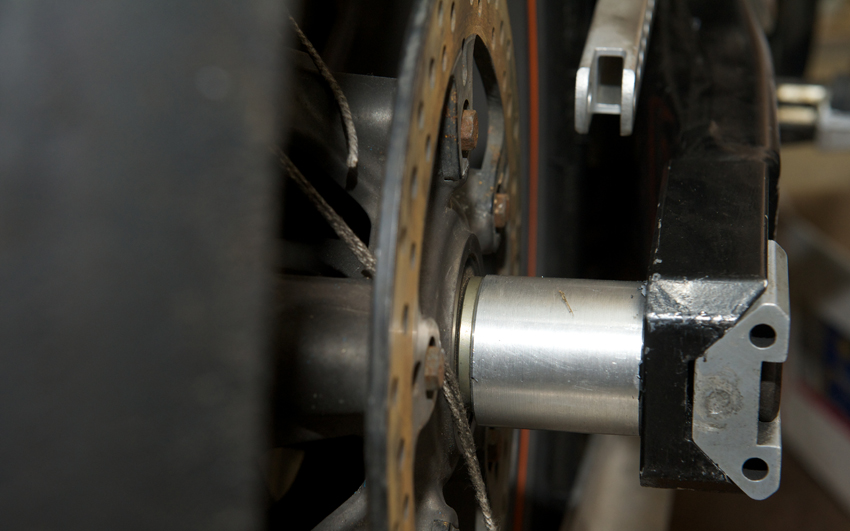
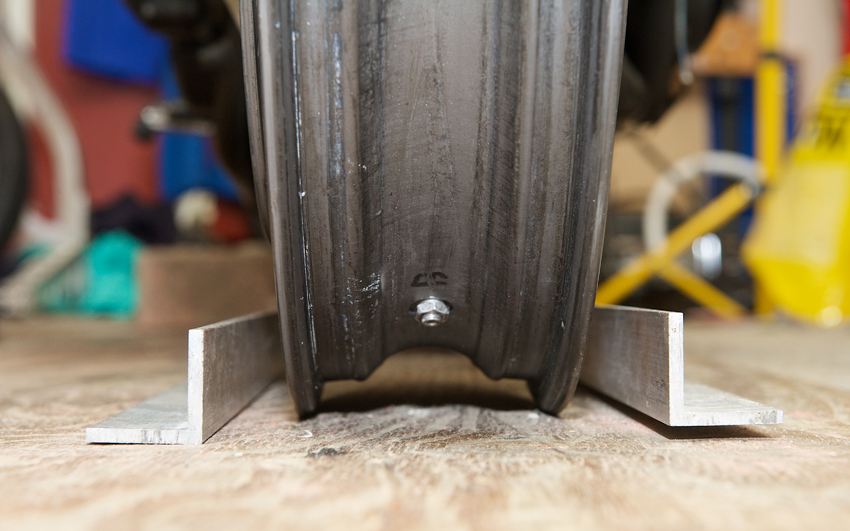
After that I fitted the rear wheel, again with some ally inserts I made up at college. The KTM rear wheel takes a 25mm axle, however the EXUP one is 20mm thick. So the inserts have an outside diameter of 25mm and in inside diameter of 20mm. I just insert those in the wheel bearings then pass the axle through them to mount. This puts the wheel in the correct place so I can get it central. Once it's central I can work out what size spacers and rear brake bracket I need and also what the sprocket offset it compared to the standard rear wheel.
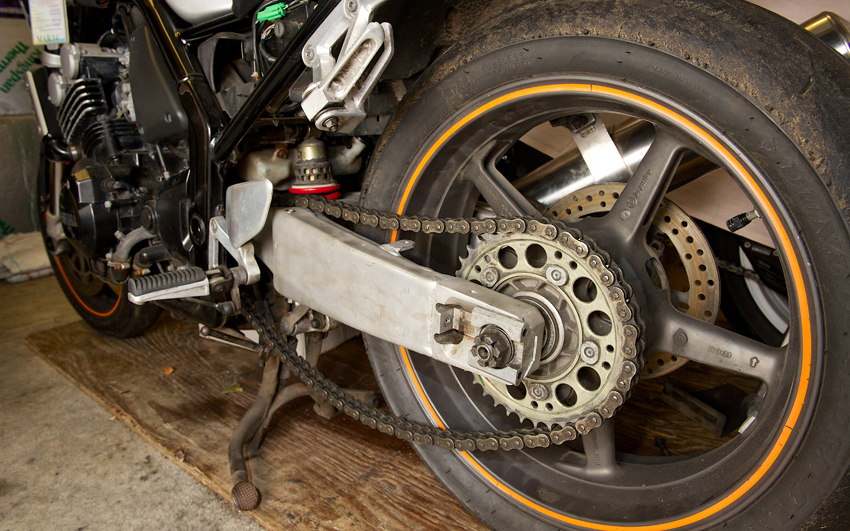
I placed the wheel centrally using just my eyes and it looks like it lines right up. The calculations I did a week or so ago suggest that the offset is in fact 2.5mm. I have some long straight metal bars that I will use to get it placed as accurately as possible and then take some measurements. Have to do some work on the house on Saturday, so looks like Sunday will be the time for this, especially as the weather forecast is pants!
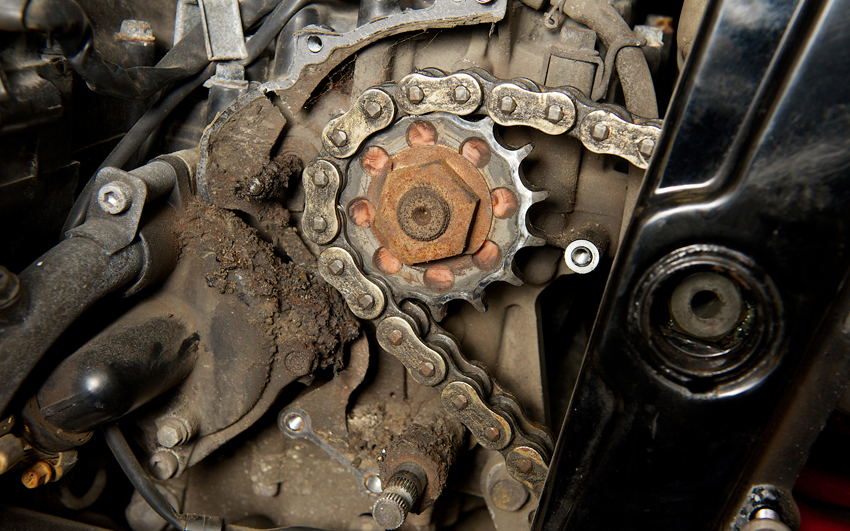
Day 20 - 28-10-13 - Trying to align rear wheel with front. Try to remove front sprocket so I can see how much the front sprocket needs to be offset. Couldn't get the nut off.
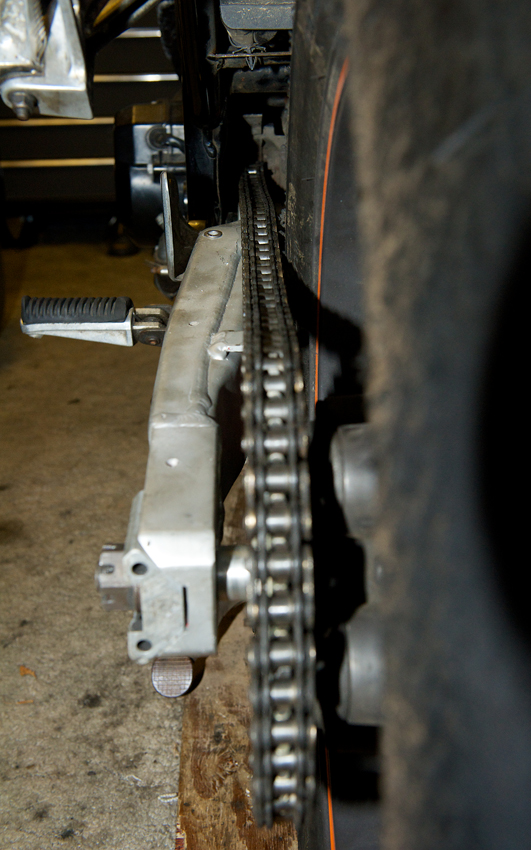
Day 21 - 29-10-13 - Try to remove front sprocket so I can see how much the front sprocket needs to be offset. Finally get it off after bracing the rear wheel more effectively. Fit second hand exhaust can and link pipe bought off eBay. It's a Quill titanium. Remove chain. Remove right foot rest and brake M/C.
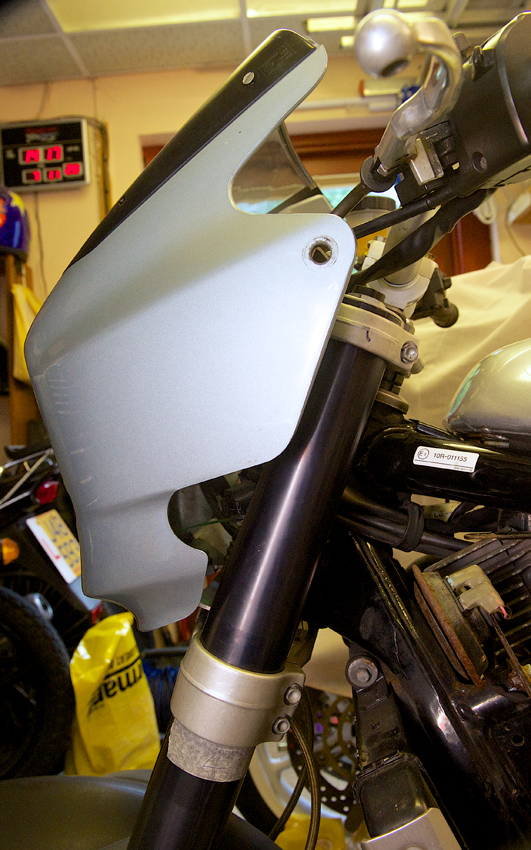
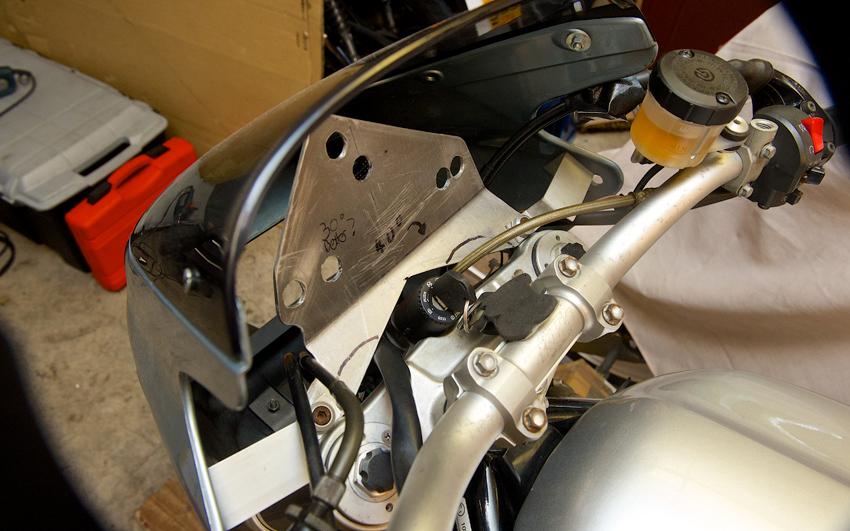
Day 22 - 5-11-13 - Did some more work on the fairing mounts today. Got the fairing sitting as close as possible to the forks by shortening the lower mount bracket. Have to work out how to make the top mounts look "nice".
In the evening I was at the college for my fabrication course. I worked on the lathe all evening trying to make some wheel spacers to help with lining up the rear wheel centrally. Unfortunately I didn't even manage to make one set as I broke one of the tools and had to start again! All part of the learning curve. I'll have to wait until next week before finishing them off.
Not a huge problem as I'm waiting for new bearings for the swing arm. Last week I took the second EXUP swing arm I bought to a engineering firm to have the swing arm pivot width machined down by 5mm on each side. They managed to do that the day after, however I'll pick it up once the bearings are in so I only have one trip to make.
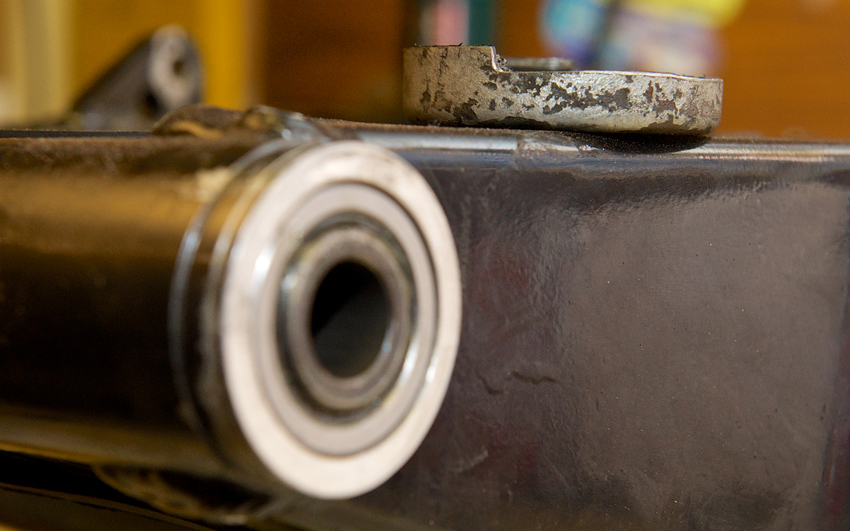
Day 23 - 8-11-13 - Picked up the swing arm yesterday and today I fitted the new bearings in it. The EXUP inner axle is 28mm thick, but the EXUP is 24mm thick, so I had to get bearings with a smaller inner diameter. The standard bearings in the Fazer swing arm are 25mm wide, however the only ones I could get at the correct internal diameter were 20mm wide. I'm hoping that will be OK. Meanwhile I'll keep searching for some the same size as I would prefer to have these sort of things the same size or bigger, rather than smaller than standard.
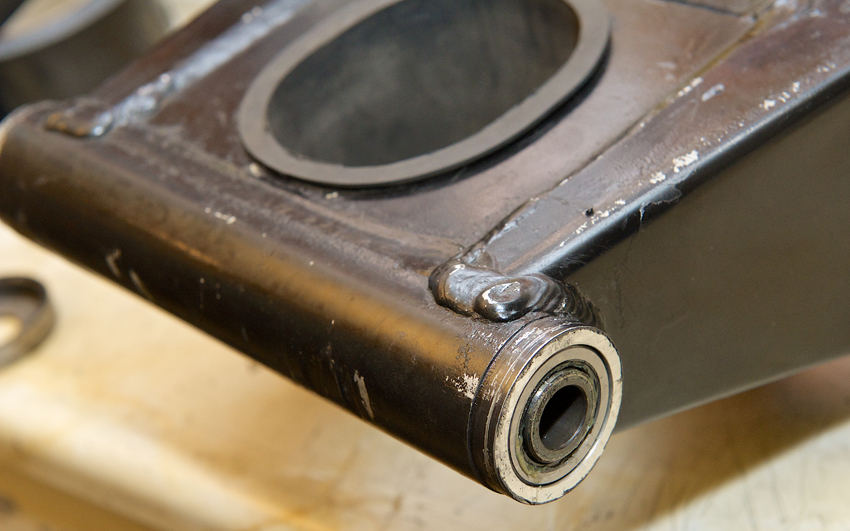
They'll be coming out when I get things powder coated, however that's some way off. As they may well get damaged on removal I'll replace them just in case. Getting these ones in was a bit tricky on one side as the bearing kept going off centre. I didn't install them in the best way as I tapped them in with a hammer and a piece of wood to protect them. I did the old trick of sticking the bearings in the freezer overnight and heating up the swing arm before fitting. The idea being the bearings shrink ever so slightly in the cold and the swing arm expands ever so slightly in the heat, making the bearings drop in a lot easier. Well the first one did, but not the second. Grrrrrrrrr!
Had to trim down one of the spacers that fits between the frame and the swing arm as now each side is 5mm narrower the spacer doesn't sit flush as it hits a weld.
Had another look at my speedo bracket and realised that it would be too tight a fit to site the lap timer where I wanted it. So I adjusted the lower fairing bracket by raising it with three extra nuts as spacers. That makes it sit a little higher and it actually looks better positioned anyway. I wont know for definite until I have all the bodywork done, as it all needs to "flow". It has however made the design of the upper fairing mounts a bit more complex. Still thinking about how to make them look nice and not bodged.
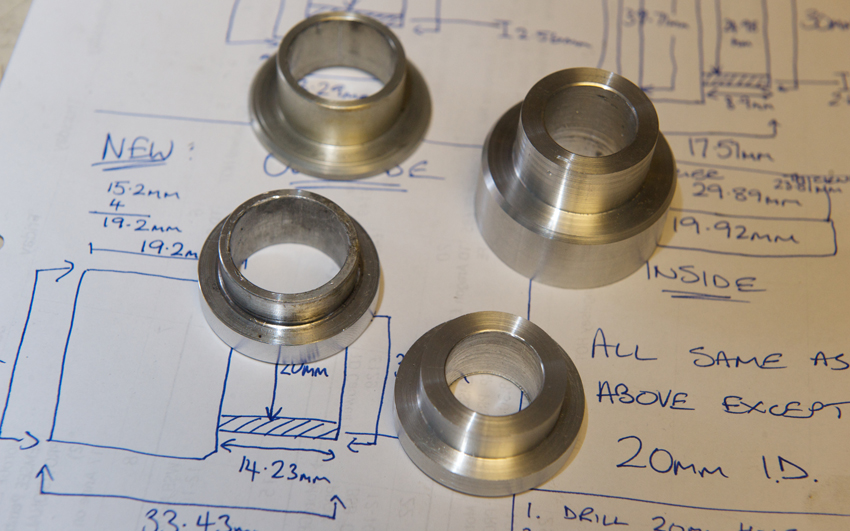
Day 24 - 12-11-13 - At college. Made spacers 15mm and 48mm wide.
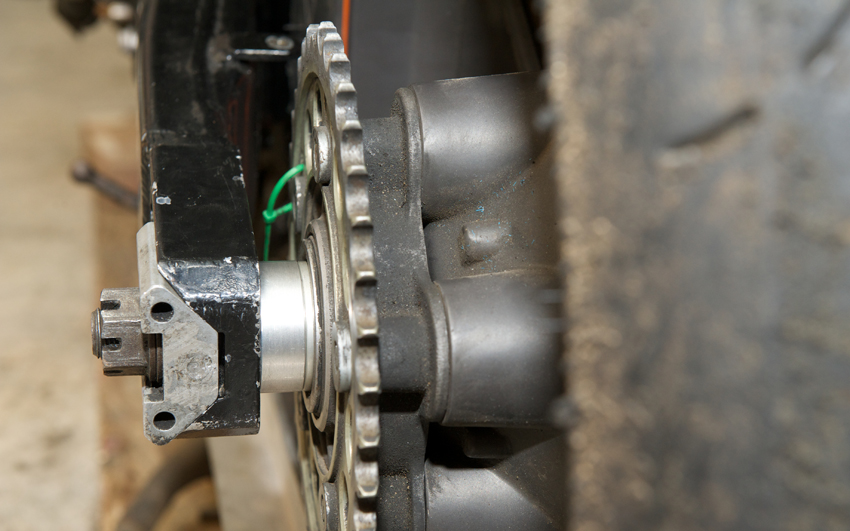
Day 25 - 13-11-13 - Fitted spacers to rear wheel. Forgot inner spacer on sprocket hub and as such when I was tightening the axle I heard some unusual noises. Having once in the past done exactly the same thing I realised I had forgotten to insert the inner spacer. Doh! Once that was fitted the terrible noises went away. The rear wheel lines up perfectly with number plate mark I made showing the centre of the rear wheel before removing the standard swing arm and rear wheel. Straight edges on wheels. Seems OK.
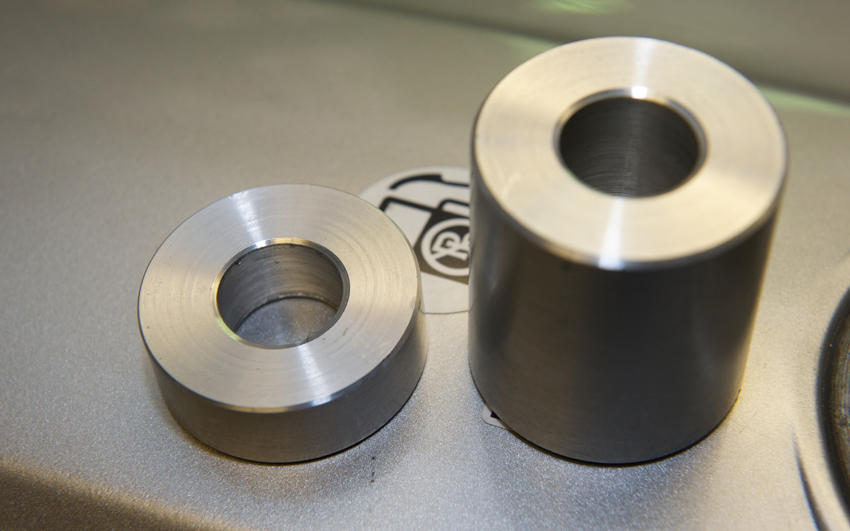
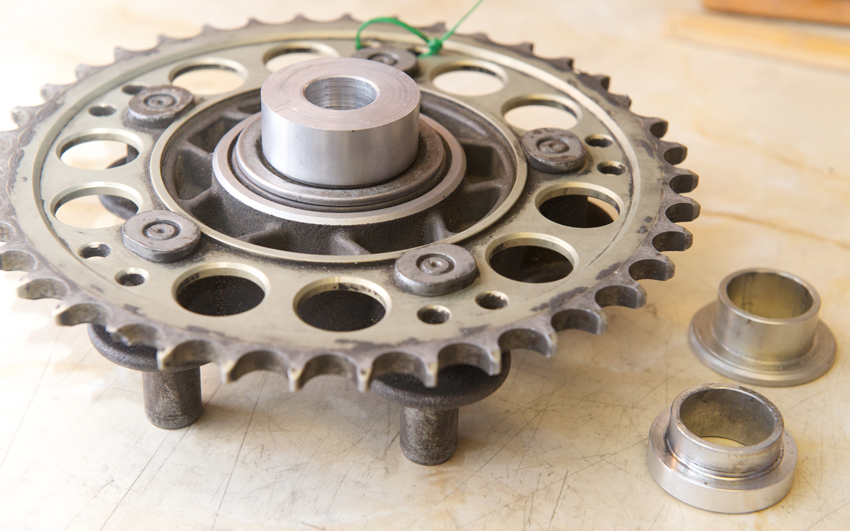
Day 26 - 19-11-13 - At college. Made spacers for sprocket carrier. Had to sand down at home after. Took wheels in to have tyres removed so I could better line up front and rear wheels. Pictured below the originals on the left with my custom versions on the right.
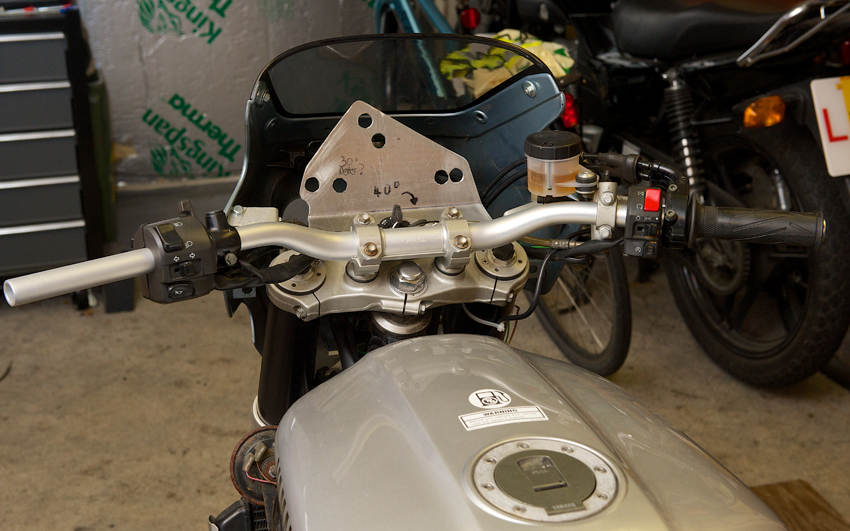
Day 27 - 23-11-13 - Fitted some LSL handlebars I bought off eBay. They are pretty much the same as the KTM OE ones, just not so swept back. They look like new, so big improvement over the OE ones. Plus I'm not sure the OE bars are straight after their interface with the tarmac.
I spent the best part of the afternoon trying to get the wheels in line. Kept getting different readings which got very frustrating. Then I had a brainwave. I'd tightened up the rear axle, although I hadn't torqued it up to the correct level. So I did that and my measurements completely changed. Initially my measurements showed the front wheel was offset in relation to the rear. After torqueing up it still was, but the opposite side! Oh dear. I then torqued up the front as well, just in case.

After this I got more consistent results and it showed the front was pretty much properly in line with the rear as there was only about half a millimetre difference on either side of the front wheel. Took a long time to get to this point, so felt I'd wasted some of the afternoon. However I was pleased that the wheels seem to be in line based on my first measurements and the first spacers I'd made. So I allowed myself a pat on the back.
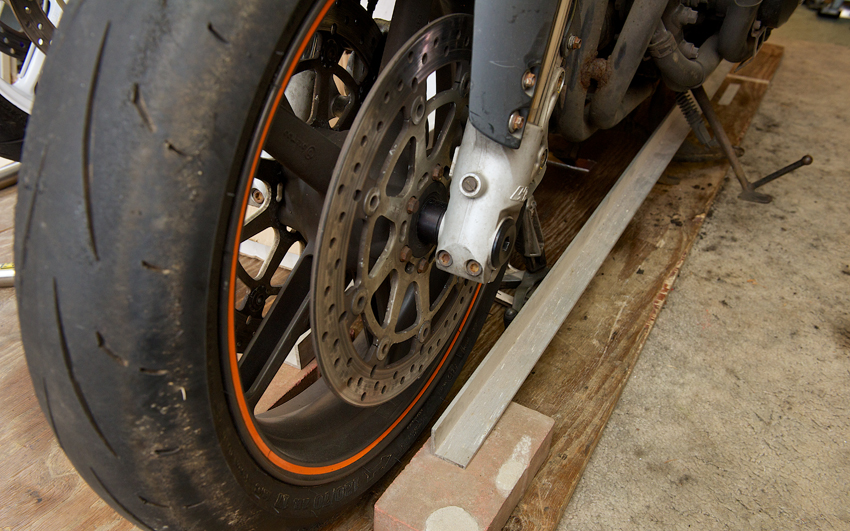
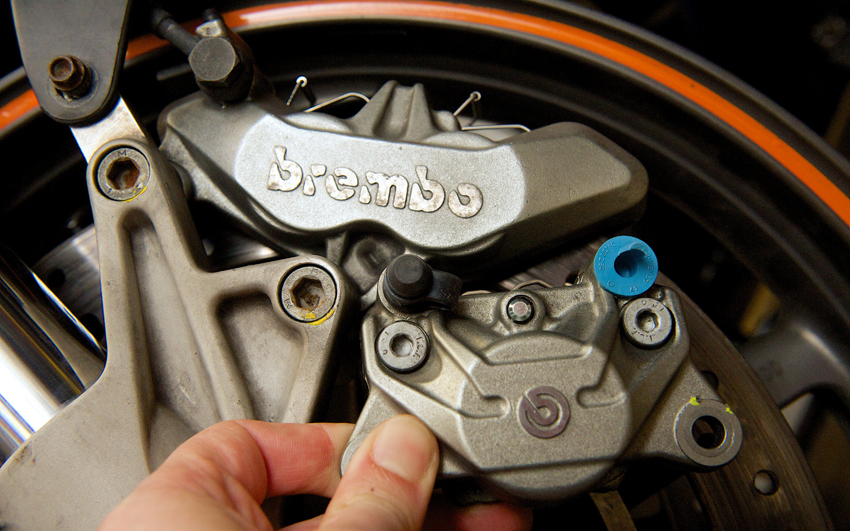
Next up I need to get myself a rear caliper, then once I have this I can design and make a bracket to hold it in place. Looking at getting a Brembo to compliment the fronts. I'm after the one fitted to a Ducati 749/999 as it's a twin opposed piston design and is silver/grey like the fronts.
I had hoped to use the KTM one I have from the Super Duke, but it has a cut out in the bracket where the pads slot in and this would be very difficult for me to replicate. I had hoped to go for an under slung caliper as this makes wheel fitment so much easier. After discussing this with my college tutor I felt it required too much work on the swing arm and could possibly weaken it. As such I'm going to use the torque arm already in place on the EXUP swing arm and mount it at the top of the disc. Even though I dislike the look of torque arms.
Once I've got the brake bracket made and reconfirm the wheels are in line I'll measure up how far the front sprocket needs to be offset.
Day 28 - 3-12-13 - I've run out of things to make at my evening class, so I remade the sleeve that fits in the top yoke. The one I made before was fractionally smaller on the outside diameter and the pinch nut couldn't be tightened enough to grip it. Well I just managed to finish it before the end of the class and now it's fractionally too big! Blast. I'll get some sandpaper on it and try and make it fit.
Also received a Brembo rear caliper I'd bought off eBay. So next job will be to make a bracket to mount that. I thought it was the same silver colour as the front calipers, but it's more of a gun metal colour. Bit disappointed with that, so I may sell it and buy another that hopefully is a colour match for the fronts. Actually comparing the two together it's not as different as I imagined. I might get away with that as they will be well away from each other. I'll see what it looks like when mounted.
If you would like to receive an email update when the next instalment is published then please email me at rubyracing@hotmail.co.uk putting "Project Ruby Racer Updates" in the subject box. Don't worry I'm not going to spam you, you will only receive an email whenever I update this site.
Build Page: 1 2 3 4 5 6 7 8 9 10 11 12 13 14 15 16 17 18 19 20 21 22 23 24 25 26 27 28 29 30 31 32 33
*
 |
 |
 |
 |