
Build Page: 1 2 3 4 5 6 7 8 9 10 11 12 13 14 15 16 17 18 19 20 21 22 23 24 25 26 27 28 29 30 31 32 33
Day 11 - 3-10-13 - Designed a bracket to accept standard clocks for trial run when suspension fitted. Cleaned calipers.
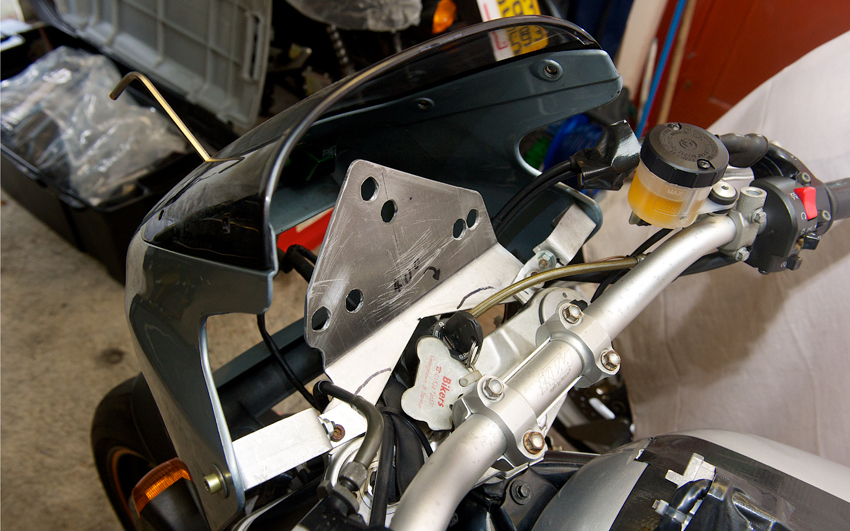
Day 12 - 5-10-13 - Made aluminium bracket for standard clocks so I can road test new forks and rear swing arm and suspension. Looked at possible positions for steering damper. Fitted new front brake reservoir and brake lever pivot pin to Brembo brakes from KTM. Cleaned master cylinder.
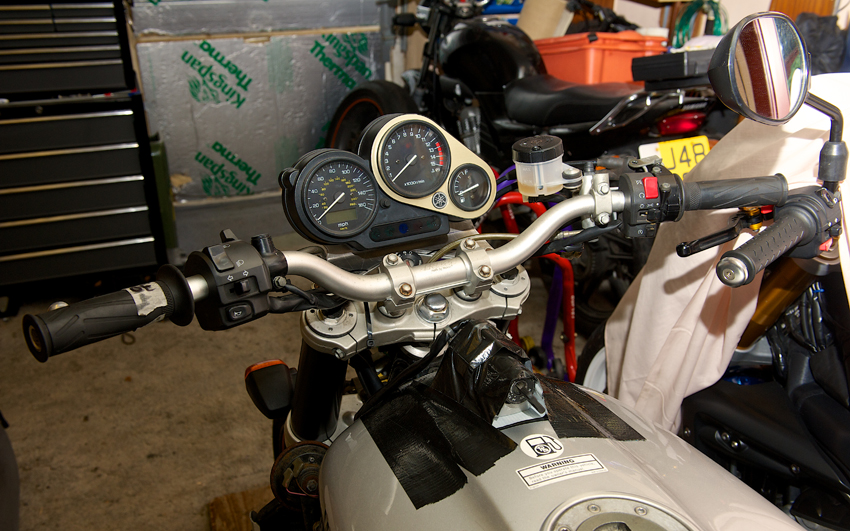
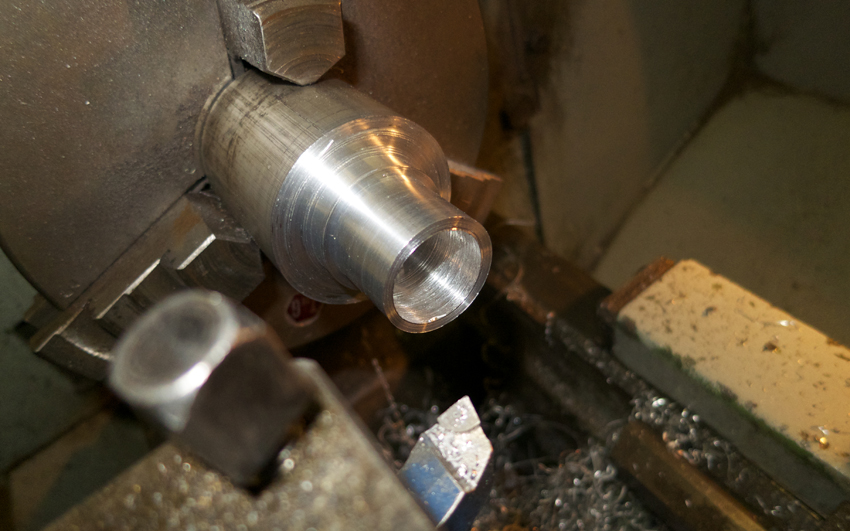
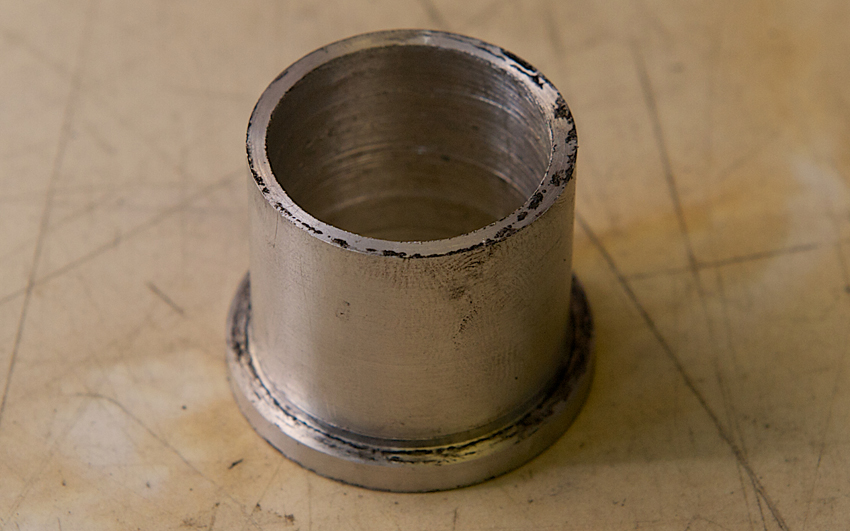
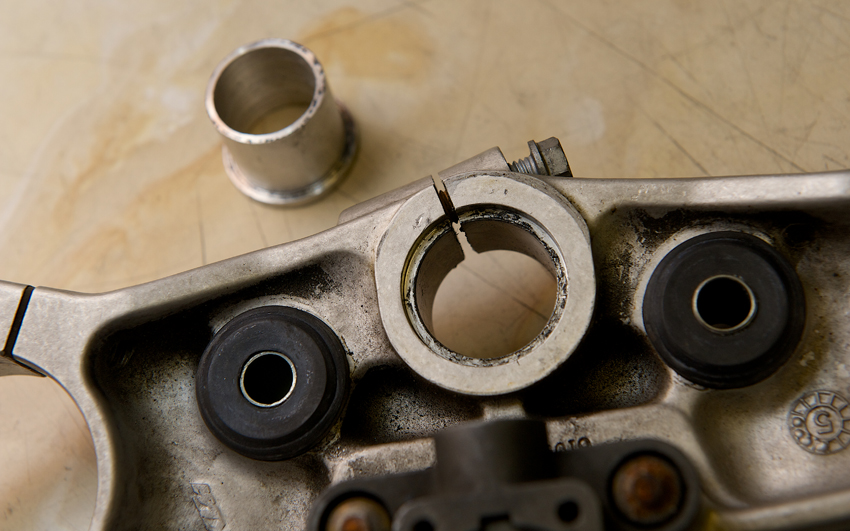
Day 13 - 8-10-13 - Fabrication course at college. Finished insert for top yoke on lathe. Took me all evening! Well, I am learning a new skill. However most of the time was spent turning down the round bar of aluminium I was using from 50mm to 32.5mm wide. I had to do this 1mm at a time otherwise you run the risk of damaging the cutting tool. Also put a bend in my temporary aluminium bracket for standard clocks.
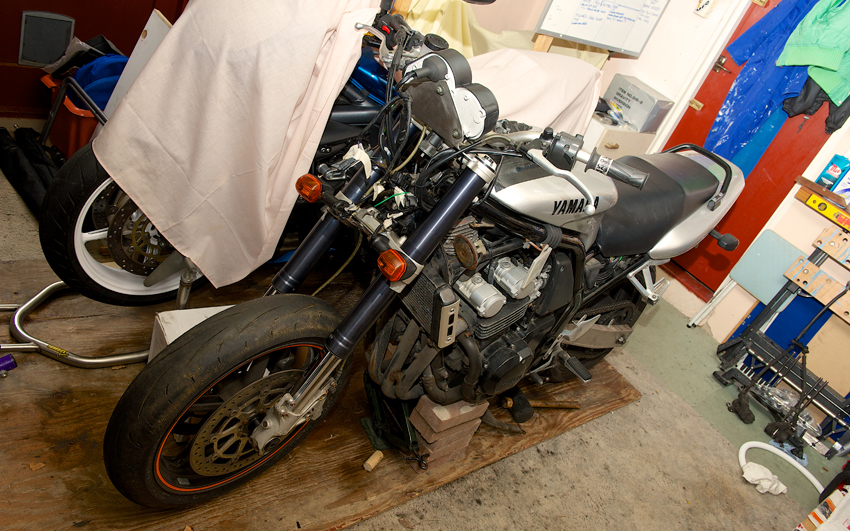
Day 14 - 9-10-13 Fit front end: yokes, forks, wheel, brakes, indicators bodged on, instruments, handle bars, standard swing arm, shock and rear wheel, and bled brakes, (lot of black specks coming out) tightened up the front end. Bodged the brake light to work. Ordered the triangular three way block connector so I can join up the KTM speedo pickup to the Fazer loom. Hopefully it will work, I'm guessing they all work the same way with some kind of magnetic pick up?
Day 15 - 12-10-13 One final check that I'd done up everything and it was time for a test ride with the KTM forks fitted. Initially I just went around the block very slowly. Everything felt OK and tight, possibly a slight bit of play in the headstock. That may be because I wasn't able to tighten it properly, or because the insert in the top yoke is ever so slightly too big. I plan to make a better one anyway, so not too worried about that at this stage. First impressions of the brakes are good. In fact they feel really nice, with plenty of feel and progressive braking. After seeing all the black specs coming out in the fluid when bleeding, I'm amazed they feel so good.
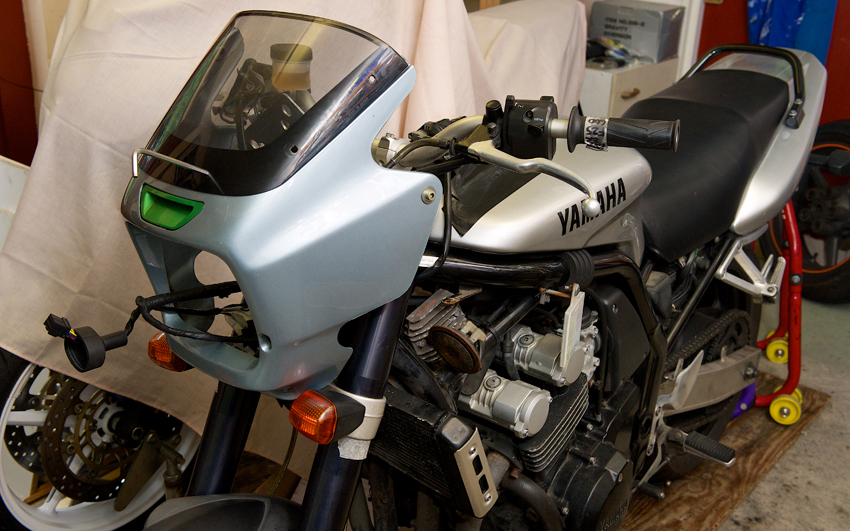
The engine still feels nice off a closed throttle. None of that snatch you get from some fuel injected bikes. Not overly eager to rev, but then it's not a sports bike. Still have that whine present and it may well be normal. When I finally get to the frame painting stage I'll take the chance to have a look inside the motor whilst it's out of the frame.
Came back home after a couple of laps round the block to adjust the handle bars (too far forward) and have a check around the bike to see if anything is leaking. All seems buttoned up. So I went further afield and gave it a couple of handfuls. Seems OK. Wasn't aware of any pulling from one side or the other, so hopefully that means the frame is straight. Just aware of some rattles somewhere. Possibly not done something up properly! Only went out for about 20 minutes and wasn't pushing it at all at this stage. Back to the garage for some more fabrication.
Started designing a new instrument bracket to hold the Koso item I got second hand off eBay. Also started making brackets to hold the ZRX nose cone on. I was going to incorporate them both in one, but as I plan on doing some racing there will be the inevitable off, so I decide to separate them so that breaking one doesn't mean the whole bracket is binned. Looking forward to Tuesday as I'm off to my fabrication class and I'll be hoping to cut down on the width of the EXUP swing arm probably using the same method as for the bottom yoke.
How would we fabricate stuff without Corn Flake packets?
Day 16 - 15-10-13 I was hoping for a clean engineering solution to reducing the width of the EXUP swing arm pivot. Unfortunately there wasn't time available to set this up so I did it the old fashioned way. I measured 5mm in on each side and scribed a guide line on the swing arm. Then took a hacksaw to it to remove the majority of the metal. Then very carefully filed down the rest to get the desired width.
I did one side pretty evenly, but the other has a bit of a high spot. It's only been reduced by 9mm as well. Not a problem as this is the swing arm that has the axle adjuster bolts stuck in, so I'm using this one as my test swing arm. Once I know how much needs removing for definite I'll be taking the other swing arm to an engineers to get it turned down properly.
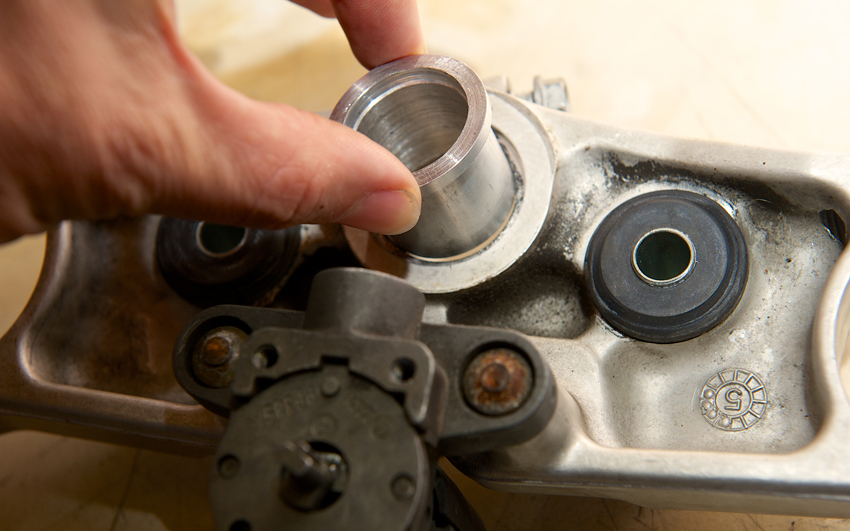
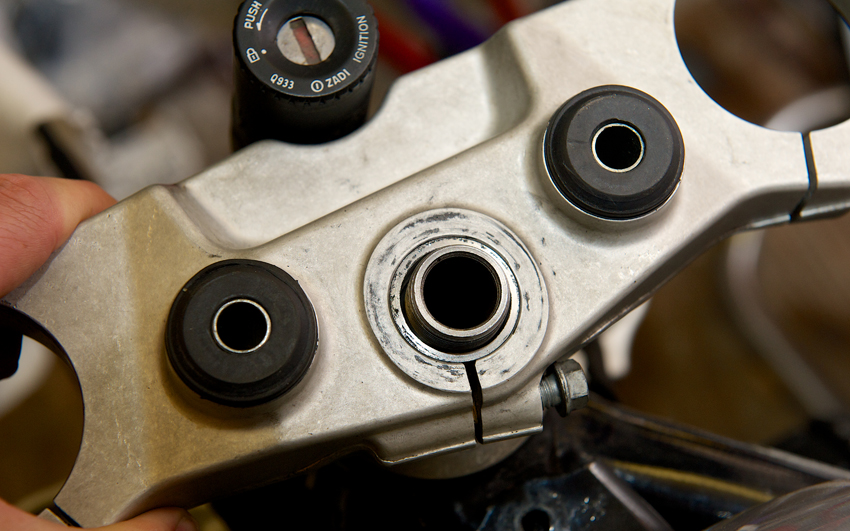
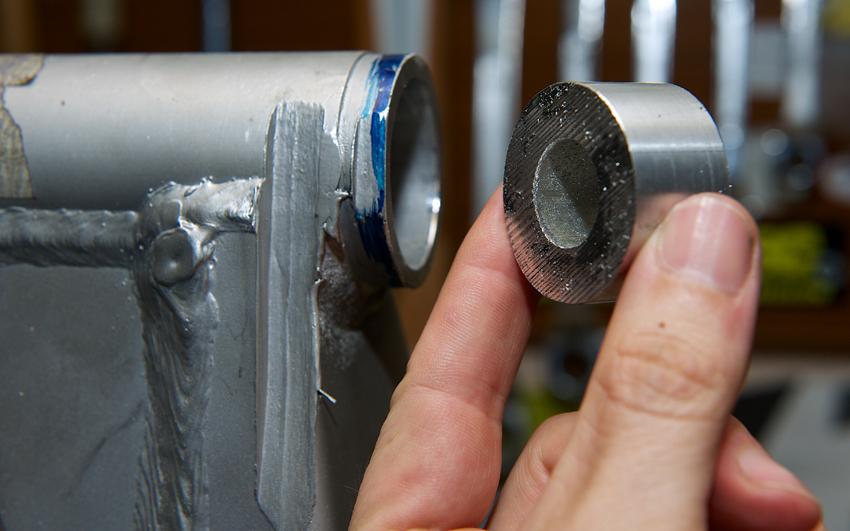
Day 17 - 22-10-13 Evening class at college. I was on the lathe all evening and made two "plugs" to go in the end of the swing arm to take the place of the bearings in the swing arm pivot. This is just so I can mount the swing arm in the frame and check clearances and if I can actually use the EXUP swing arm. I also made two sleeves that would fit in the rear wheel bearings in the KTM rear wheel, with a 25mm outer diameter and 20mm inner diameter. The EXUP rear wheel spindle is 20mm wide. Again this is so I can mock up the mounting of the rear wheel without having to spend on wheel bearings unnecessarily.
"Plug" to take the place of a bearing in the swing arm pivot to check the width I've calculated is correct.
If you would like to receive an email update when the next instalment is published then please email me at rubyracing@hotmail.co.uk putting "Project Ruby Racer Updates" in the subject box. Don't worry I'm not going to spam you, you will only receive an email whenever I update this site.
Build Page: 1 2 3 4 5 6 7 8 9 10 11 12 13 14 15 16 17 18 19 20 21 22 23 24 25 26 27 28 29 30 31 32 33
*
 |
 |
 |
 |