
Build Page: 1 2 3 4 5 6 7 8 9 10 11 12 13 14 15 16 17 18 19 20 21 22 23 24 25 26 27 28 29 30 31 32 33
Day 58 - 19-11-14 - Worked on the carbs today and fitted the bigger main jets and moved the clip on the main needle down to the fourth (bottom) groove. Also had a good look at the new Pro Mach rear sets I bought and they will do a perfect job. Took some time to get the gear shift linkage to the right length as I didn't want to go mad a make it too short.
Spent quite a bit of time just looking at the bike and working out where I'm going to package everything. It's going to be tight! Main things I'm working on are the ignition switch, steering damper, battery, relays, fuses, starter solenoid and Igniter box (ECU).
Because I'm using the ignition mount holes to mount my clocks and there's no space left for the ignition barrel, I am thinking of relocating the ignition to the front of the top frame tubes just in front of the leading edge of the fuel tank, or sunken into it. Going to be a bit of a clash as that's about the only place I can fit a steering damper (Ducati 916 stylee). However looking at the different mounts available it should be doable. Just have to work out which other bike model I'll need.
Thought about placing the battery at the front of the fuel tank area as well. I'm going to have a carbon fibre fake fuel tank cover over an aluminium custom made fuel tank, so can leave some space near the front for this purpose. However not sure if directly above the engine and cooling system is a wise place for a battery with regards to heat. Anybody have any thoughts on that?
Another possibility is mount it at the back of the fuel tank, near my gentleman's area. This might be a better option and possibly also means less rewiring as it would be near it's existing location. I should mention that I'm going to relocate the subframe higher than standard and going for a very clean, empty area under the seat with nothing in it, hence the need to find new homes for things.
One of my purchases arrived yesterday: a Yamaha RD250 fuel tank. It will be too small for the job, however I'm going to use it as a mould for the carbon fibre cover. I'll make a copy then cut it in the appropriate places to increase it's size, then make the final cover from that. Never done it before, so that's going to be a big learning curve.
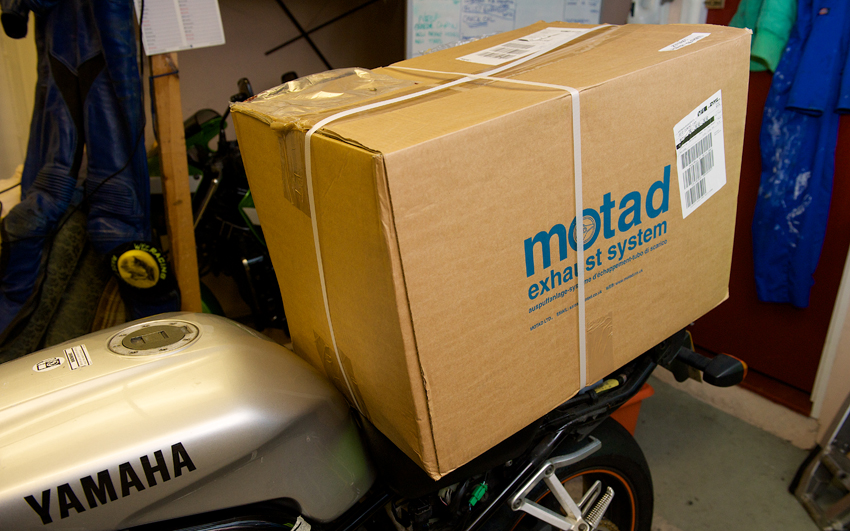
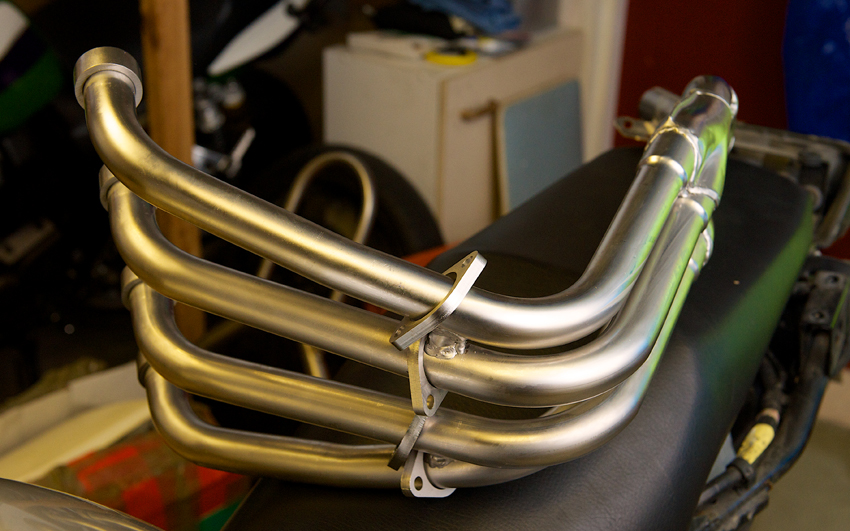
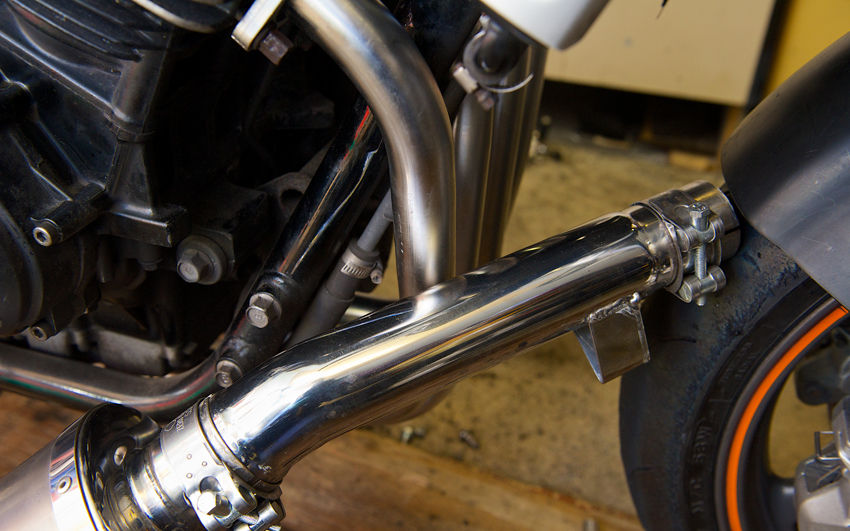
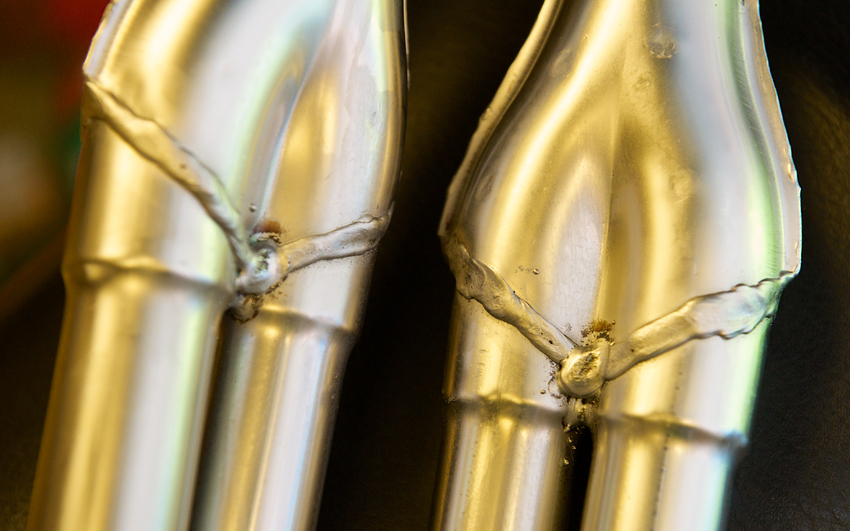
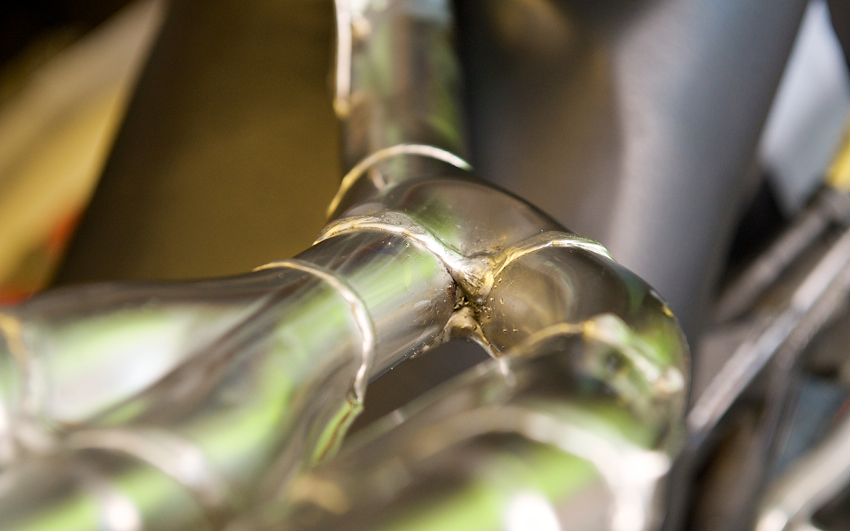
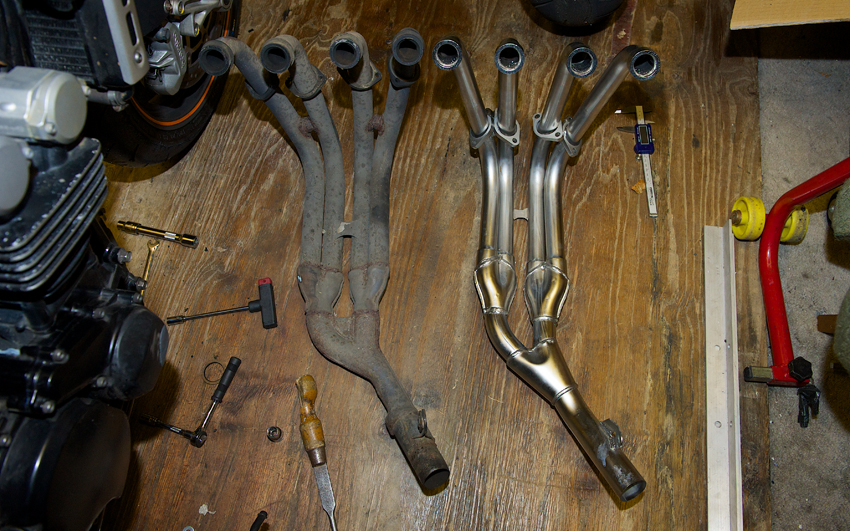
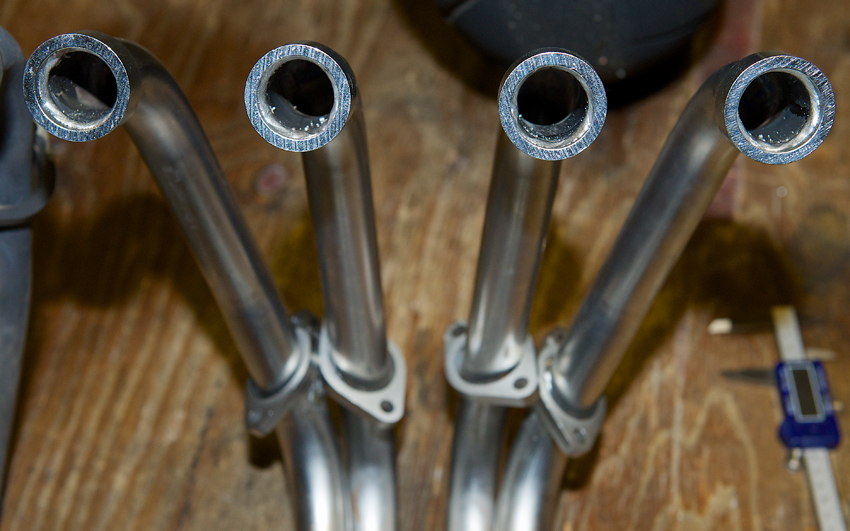
Day 59 - 22-11-14 - My new Venom system arrived from Motad. I have to say I'm not overly impressed with it. The stainless steel finish is nowhere near mirror like, more of a bare aluminium type finish. Which on it's own is OK, but clashes with the mirror finish link pipe I have. If you get one of these systems I'd recommend getting the Venom can to go with it so it all looks the same. To be fair I'm pretty sure they have been built down to a price to compare with the cheep stuff coming out of China so it's maybe harsh for me to have a pop at the quality, it's just that being made in England I expected better.
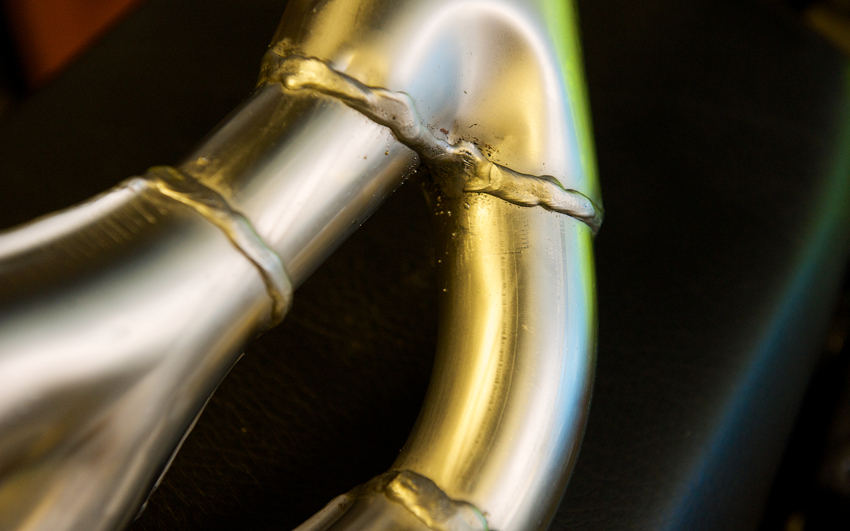
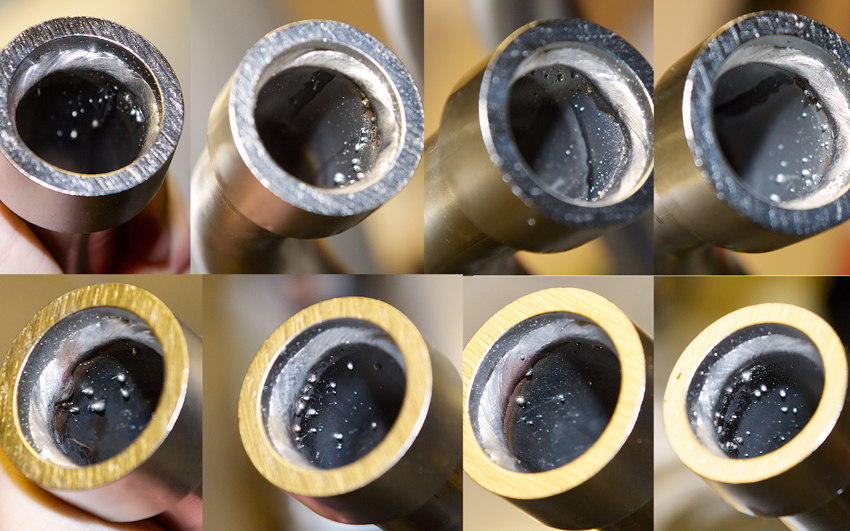
The welding is rough and there is quite a bit of splatter which wasn't removed before plating. To be fair it's mostly in areas you won't see, like inside the header pipes and under the engine. I may get it ceramic coated once the build is finished. They also sent me the wrong size exhaust gaskets (too big), however once I had advised them of this they sent the correct size which arrived the next day.
Day 60 - 25-11-14 - Got the pod filters fitted and the carbs back on.
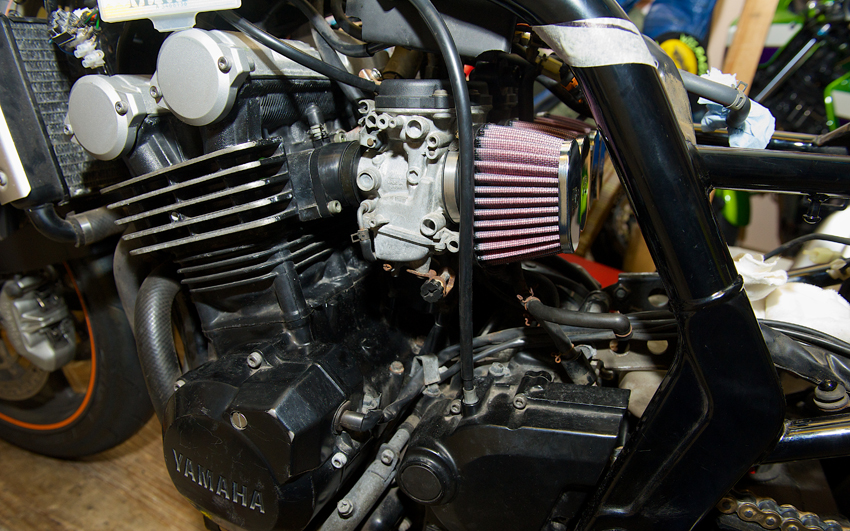
The Venom system has a slightly bigger internal diameter than the standard system, so hopefully that will let it breathe easier.

Did some photos of the bike so I could do another mock up of the tail, fuel tank and fairing set up I want to use, so I could see if I can achieve the look I'm after. Below is my original mock up and below that my latest mock up.
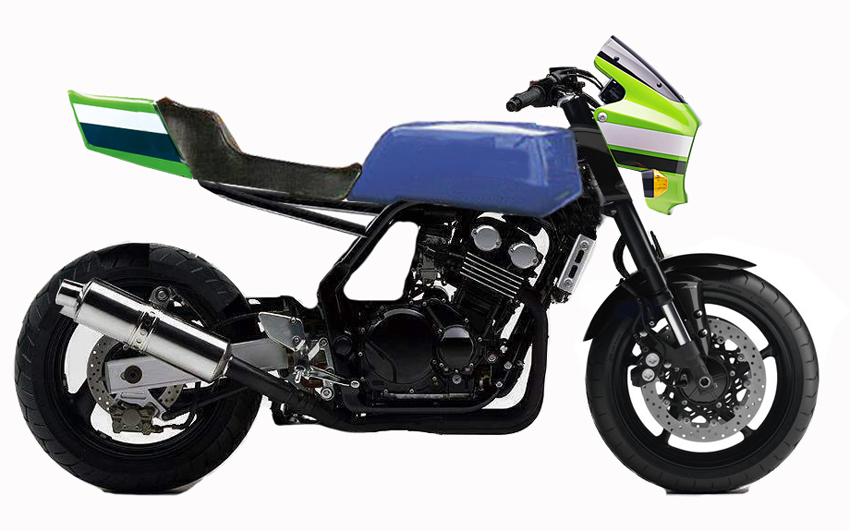

It's looking like I'm on the right track. However I don't like where I have the fairing sited as I feel it's too high and the tail, fuel tank and fairing don't flow into each other nicely. So I hit Photoshop again and moved the fairing down. That looks better.
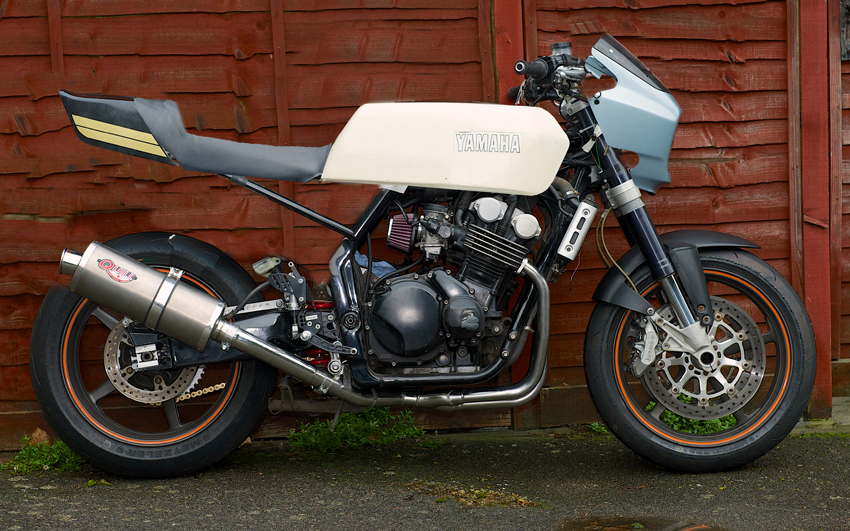
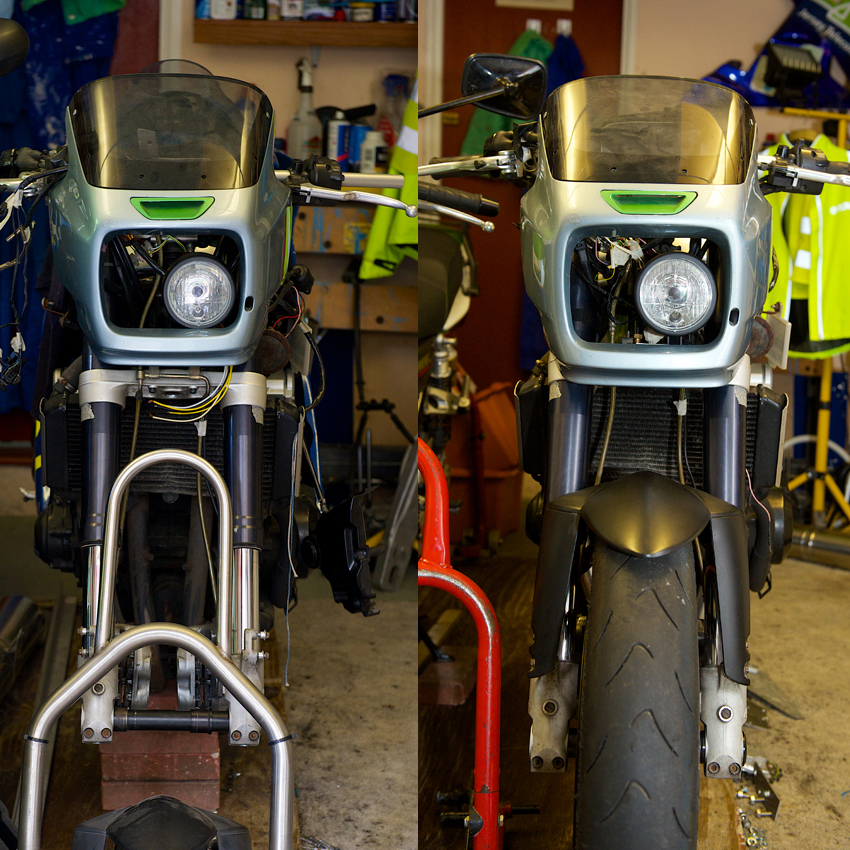
Day 61 - 30-11-14 - I've relocated the fairing in the lower position for real and feel it looks better as it covers the bottom yoke now. However it may move up a little as I haven't finalised it's position yet, but it will be very close to where it is now. Moving it down means I had to move the headlight down too. In photo below the picture on the left is original position of the fairing, on the right the latest location.
This has had a benefit in another area, namely the location of the steering damper. Previously I'd thought about mounting it in front of the fuel tank, although I really didn't want to put it there as I think they should be hidden from view. I realised I could mount it in front of the headstock by welding a bracket to the upper area of the headstock and then mounting the other end to the top yoke using the bolt hole conveniently located at the front of the yoke, or by using a fork clamp with a threaded hole for mounting of a steering damper.

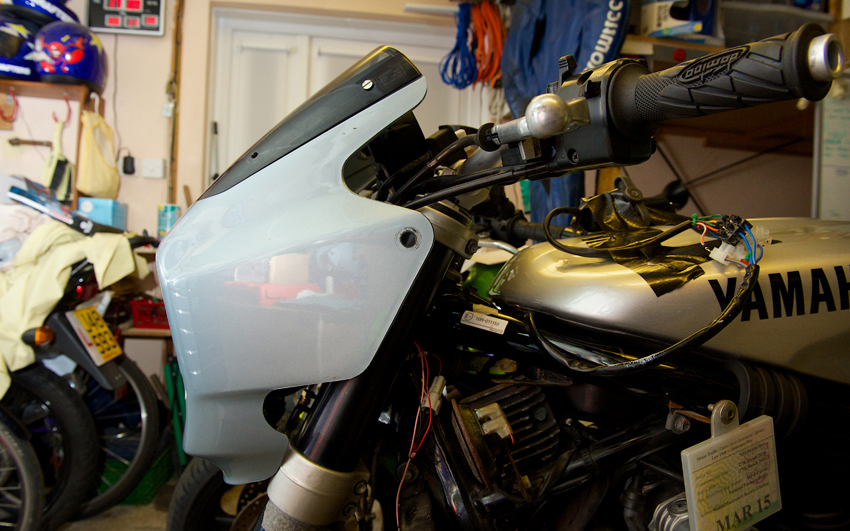
With the headlight mounted lower I realised I can use the original fairing subframe mount holes on the headstock instead and making a bolt on bracket to fit. So that's probably the next job.
I managed to test ride the bike with the new exhaust and carb set up. It's definitely perkier off the throttle and the jetting doesn't seem to be too far out, certainly above 5,000rpm it flies. Below that there is just a slight wooliness so I think one of the other jets needs changing. According to the instructions which came with the pod filters I need to change the primary main jet. It also states that when using CV carbs that you shouldn't change the needle height from standard. So when I fit the new primary main jets I'll put the needle clips back to their original position on the third groove down.
Getting closer to stage three: getting the angle grinder out!
If you would like to receive an email update when the next instalment is published then please email me at rubyracing@hotmail.co.uk putting "Project Ruby Racer Updates" in the subject box. Don't worry I'm not going to spam you, you will only receive an email whenever I update this site.
Build Page: 1 2 3 4 5 6 7 8 9 10 11 12 13 14 15 16 17 18 19 20 21 22 23 24 25 26 27 28 29 30 31 32 33
*
 |
 |
 |
 |